Lifecycle Configuration Guide
This guide explains how to configure a lifecycle from the admin application.
Configure a lifecycle
-
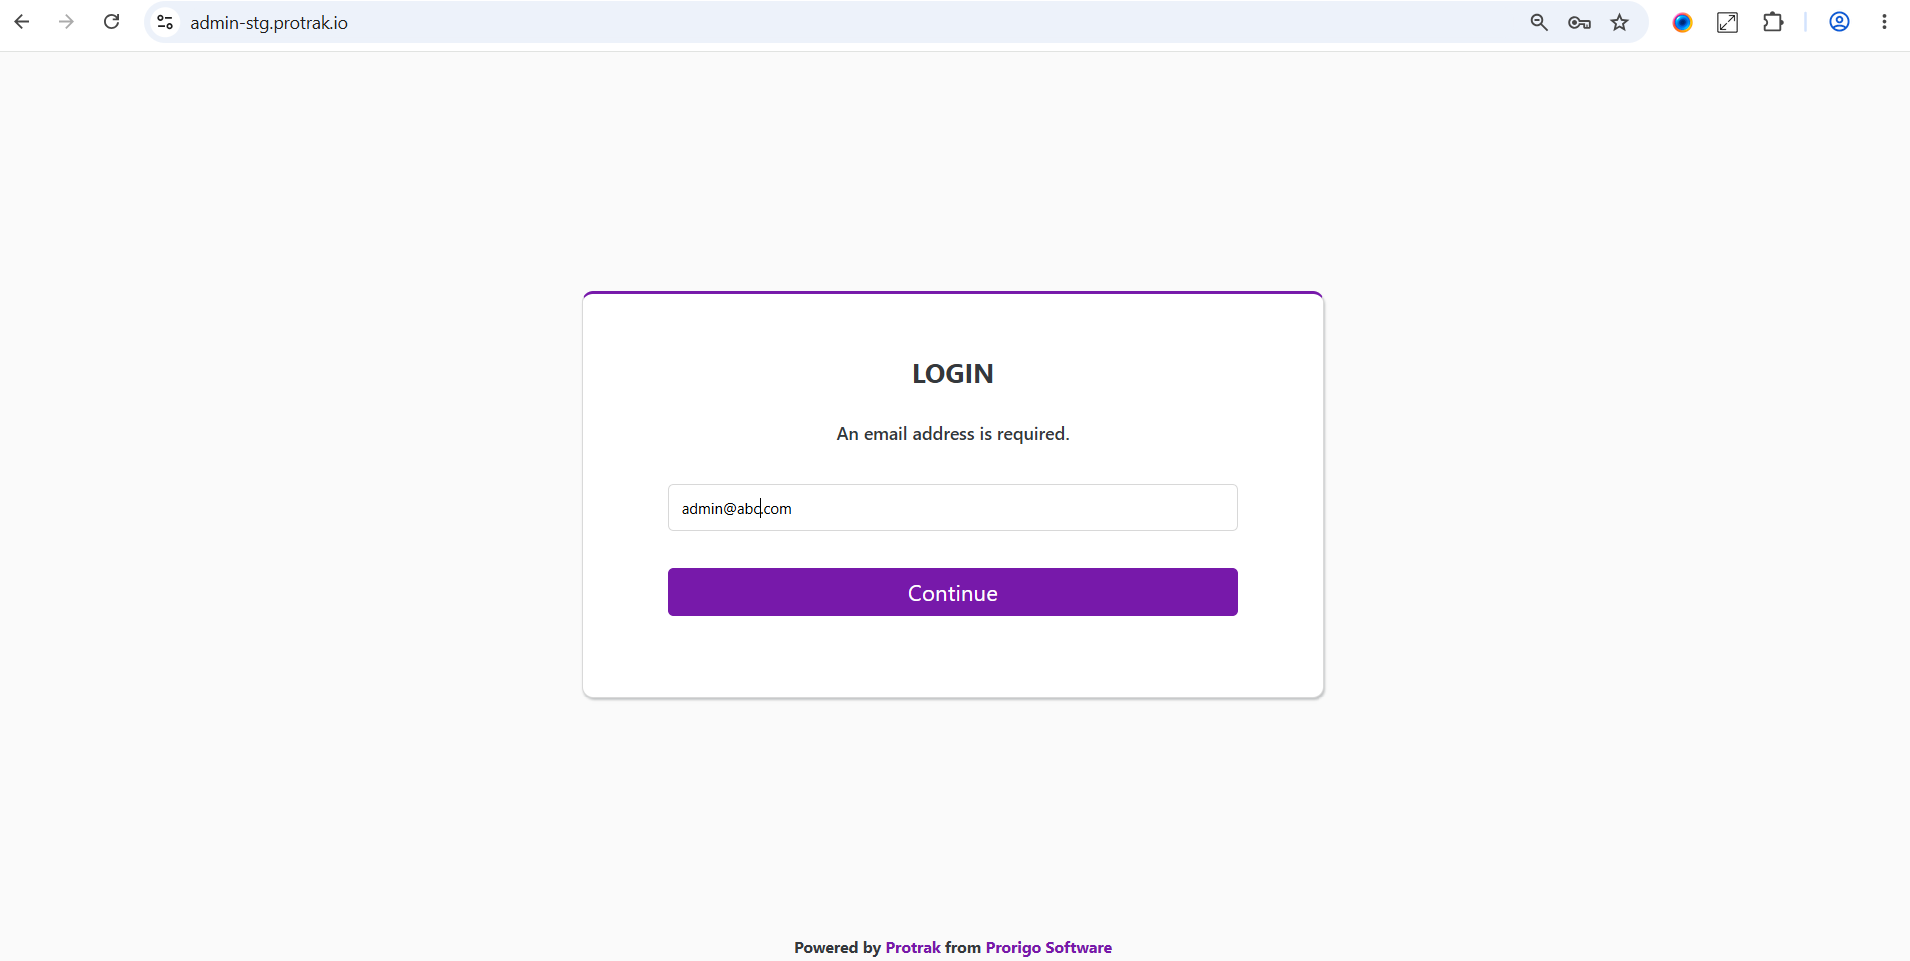
Sign in to the admin application with an administrator account.
-
Open
Schema, then selectLifecycles. ClickCreateto open the lifecycle editor.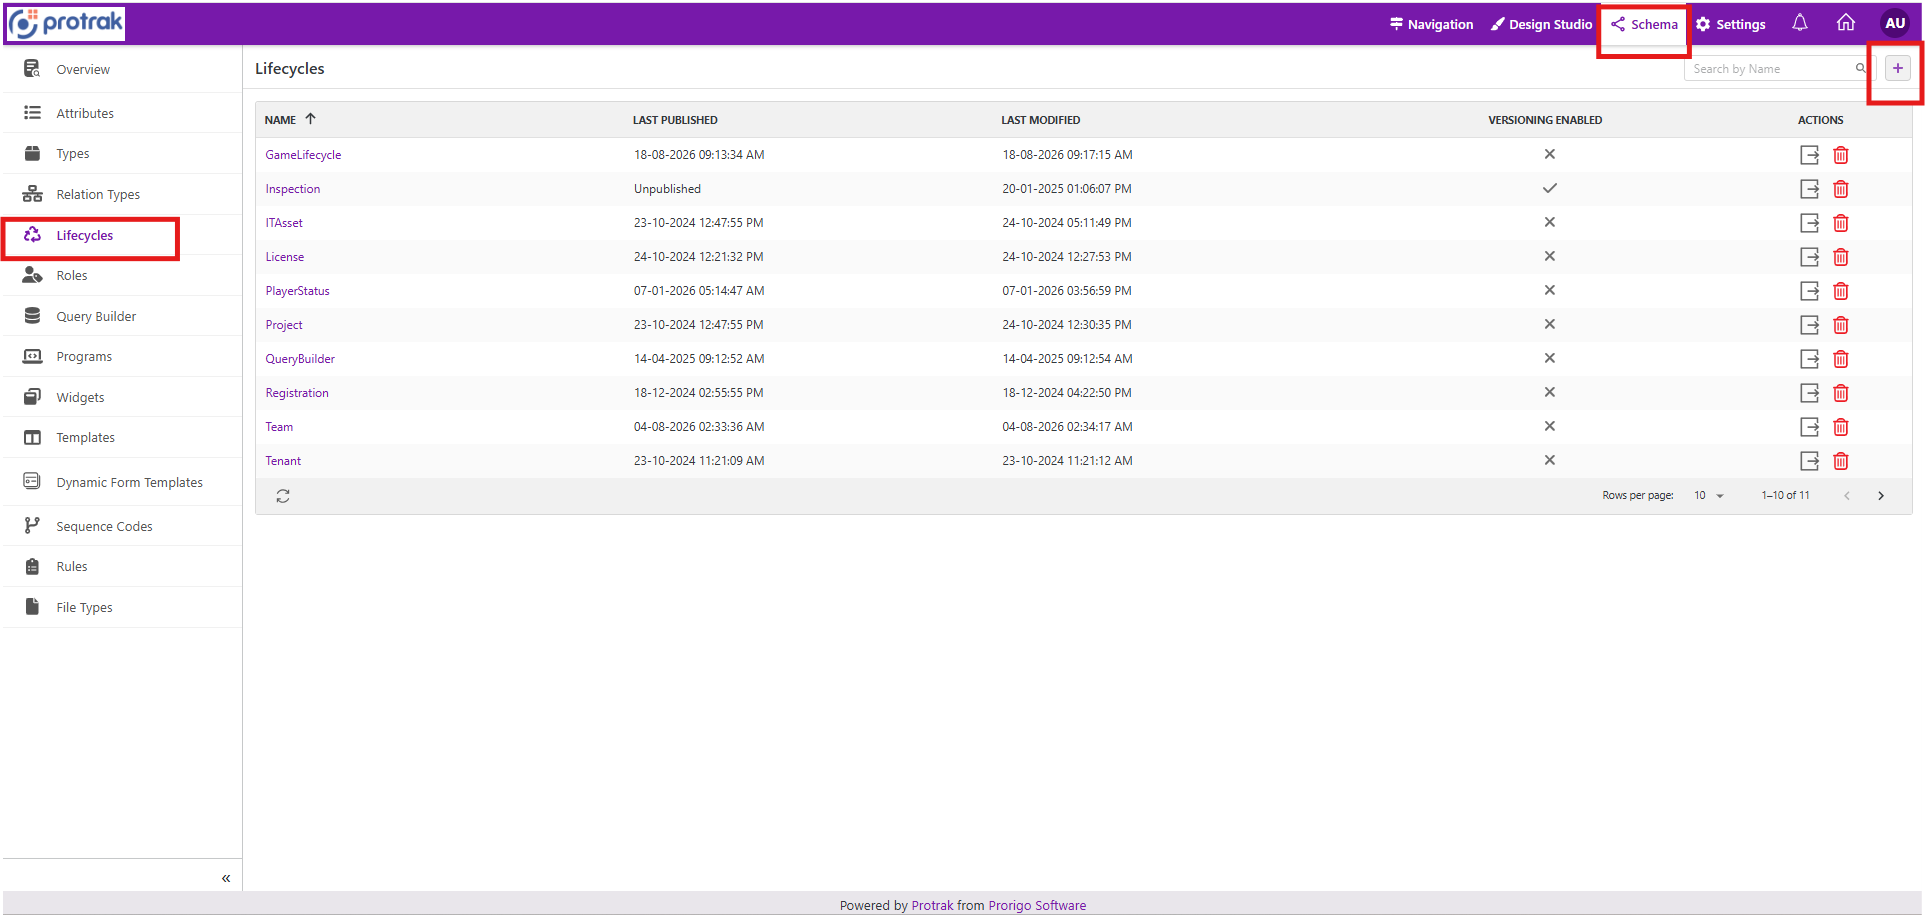
-
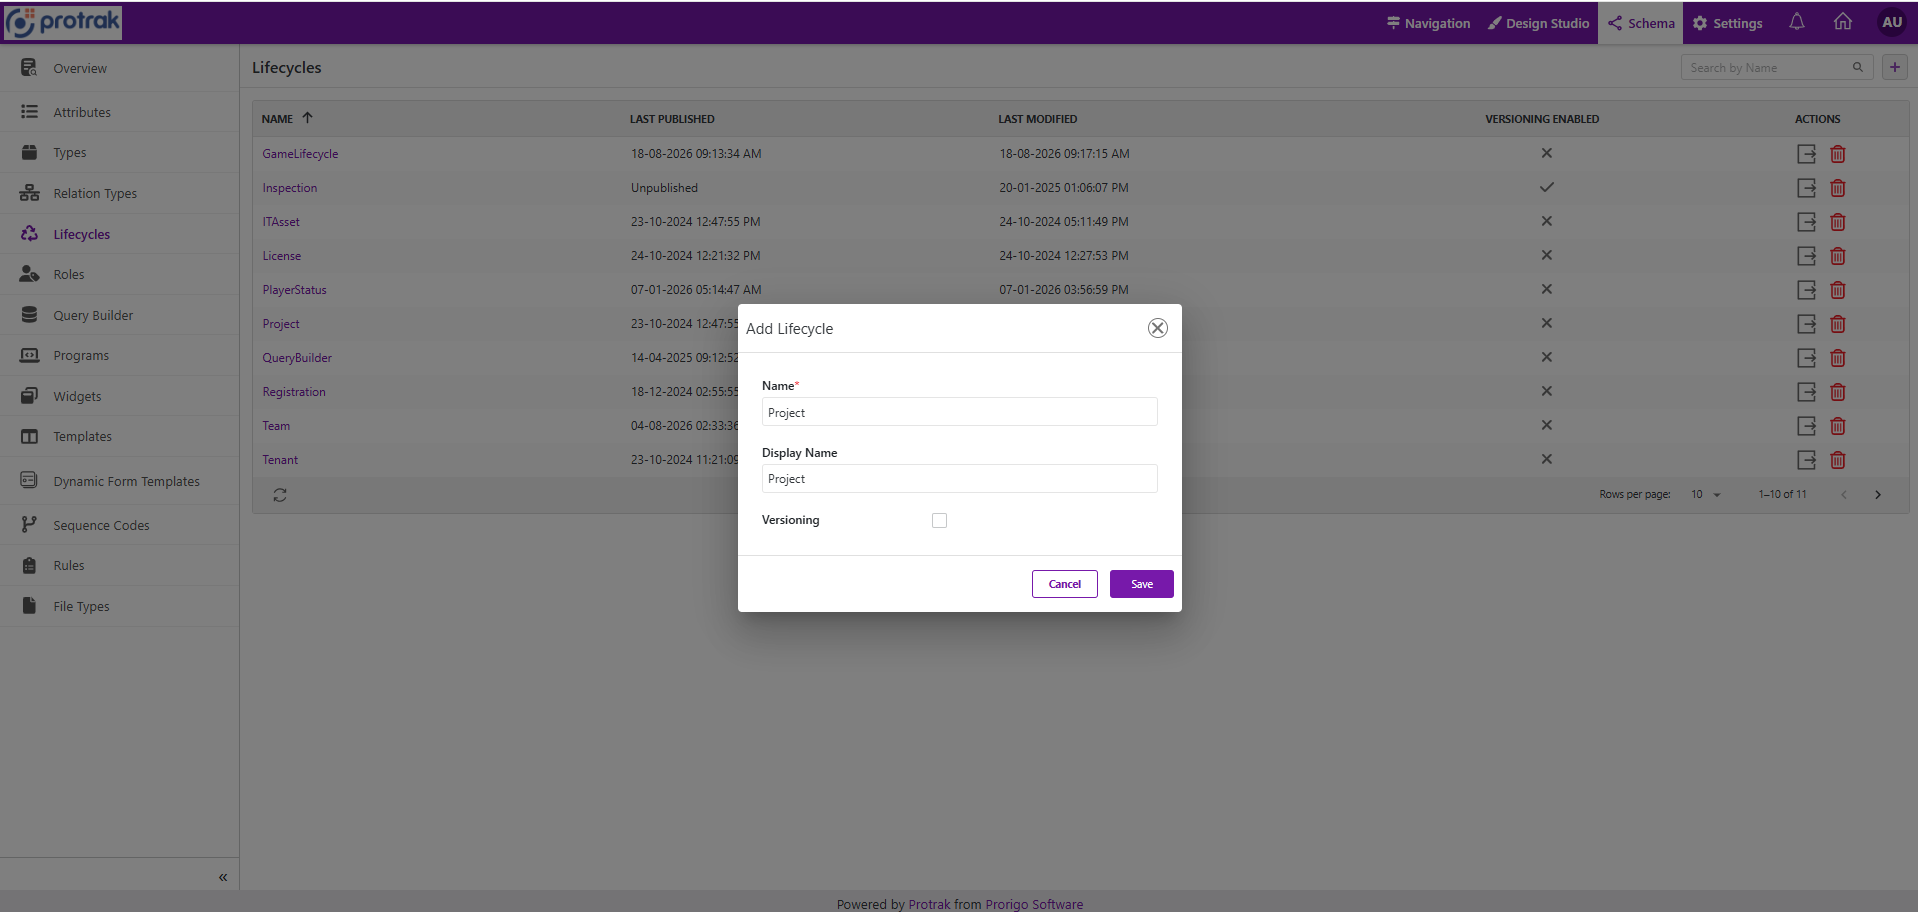
Enter the lifecycle details, including the lifecycle name, display name. Lifecycle versioning keeps a saved history of lifecycle changes, so existing records can continue to follow the lifecycle version they were created with while newer records use the latest published configuration.
After creating or modifying a versioned lifecycle, administrators must Save and Publish the lifecycle before assigning it to a type or creating new instances. Publishing establishes the version that new instances will use, including its initial state.
If a versioned lifecycle is modified after it has been published, administrators must republish the lifecycle for the changes to become the version used by newly created instances.
To verify the configuration, create a new instance through the documented creation flow and confirm that it uses the expected published lifecycle version or the initial state.
-
After creating the lifecycle successfully, a default state is added as
State. Click the edit/pencil icon to change the name.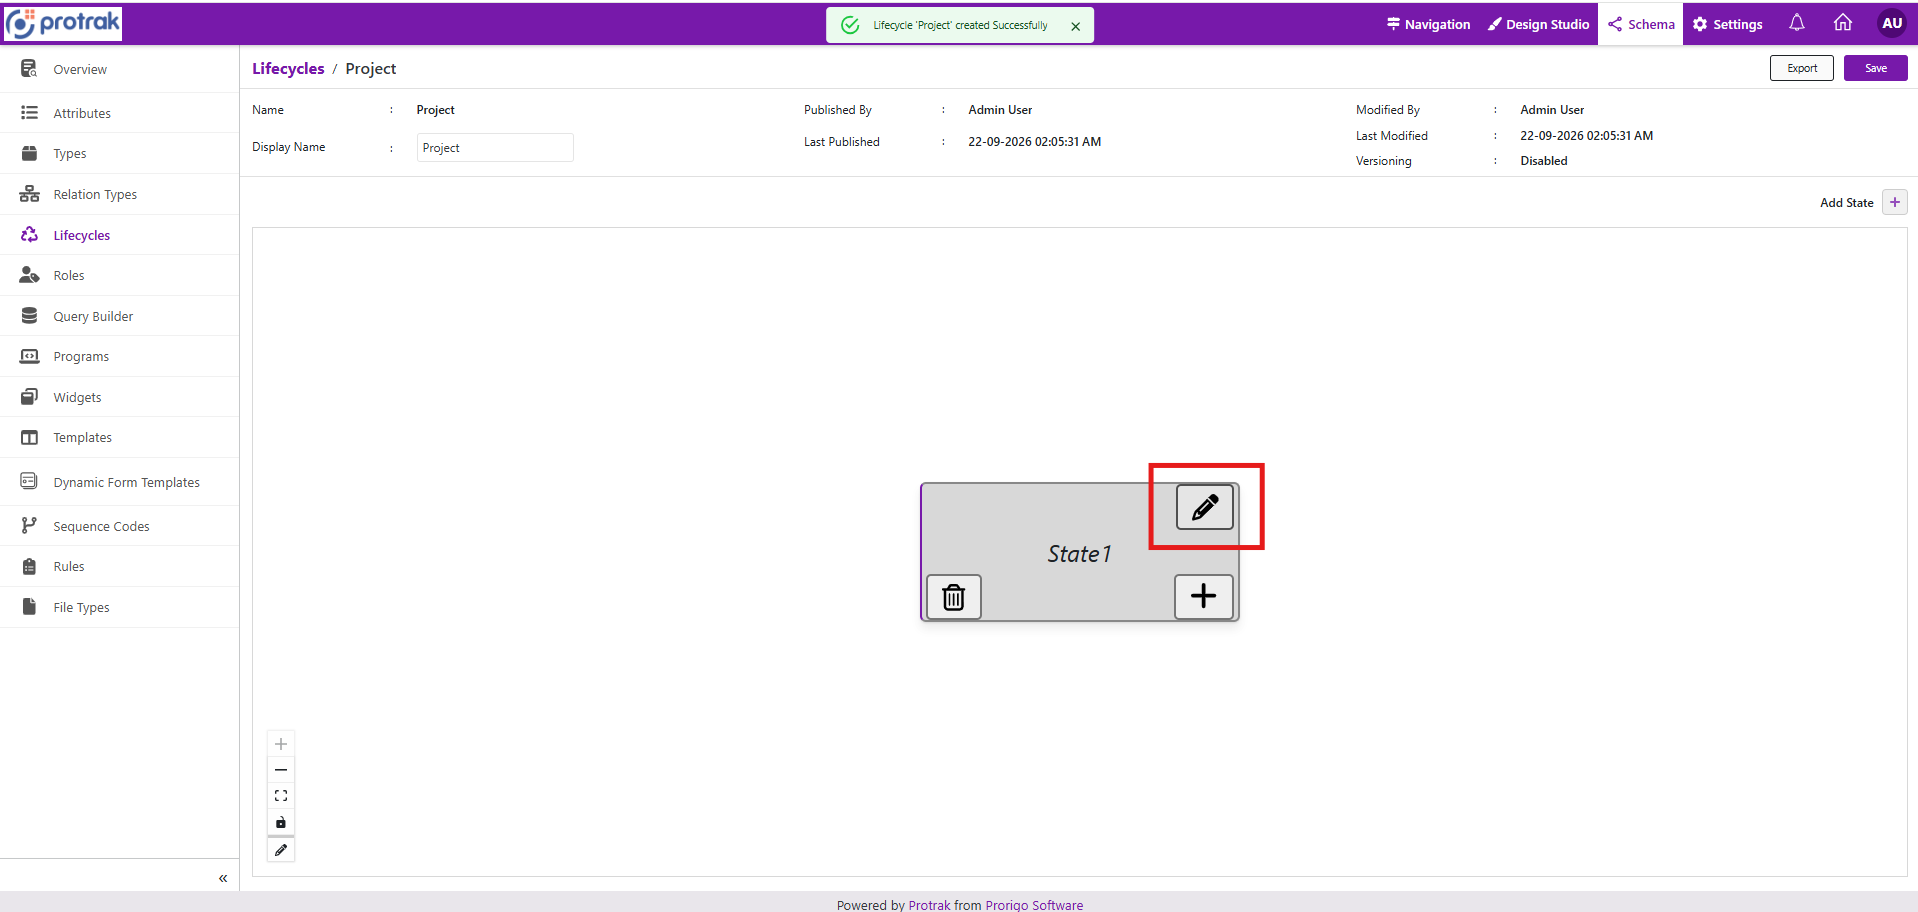
-
Enter
Newas the name and display name for the state. Keep the background color unchanged. EnableShow Promote Reminderif required, then clickSave.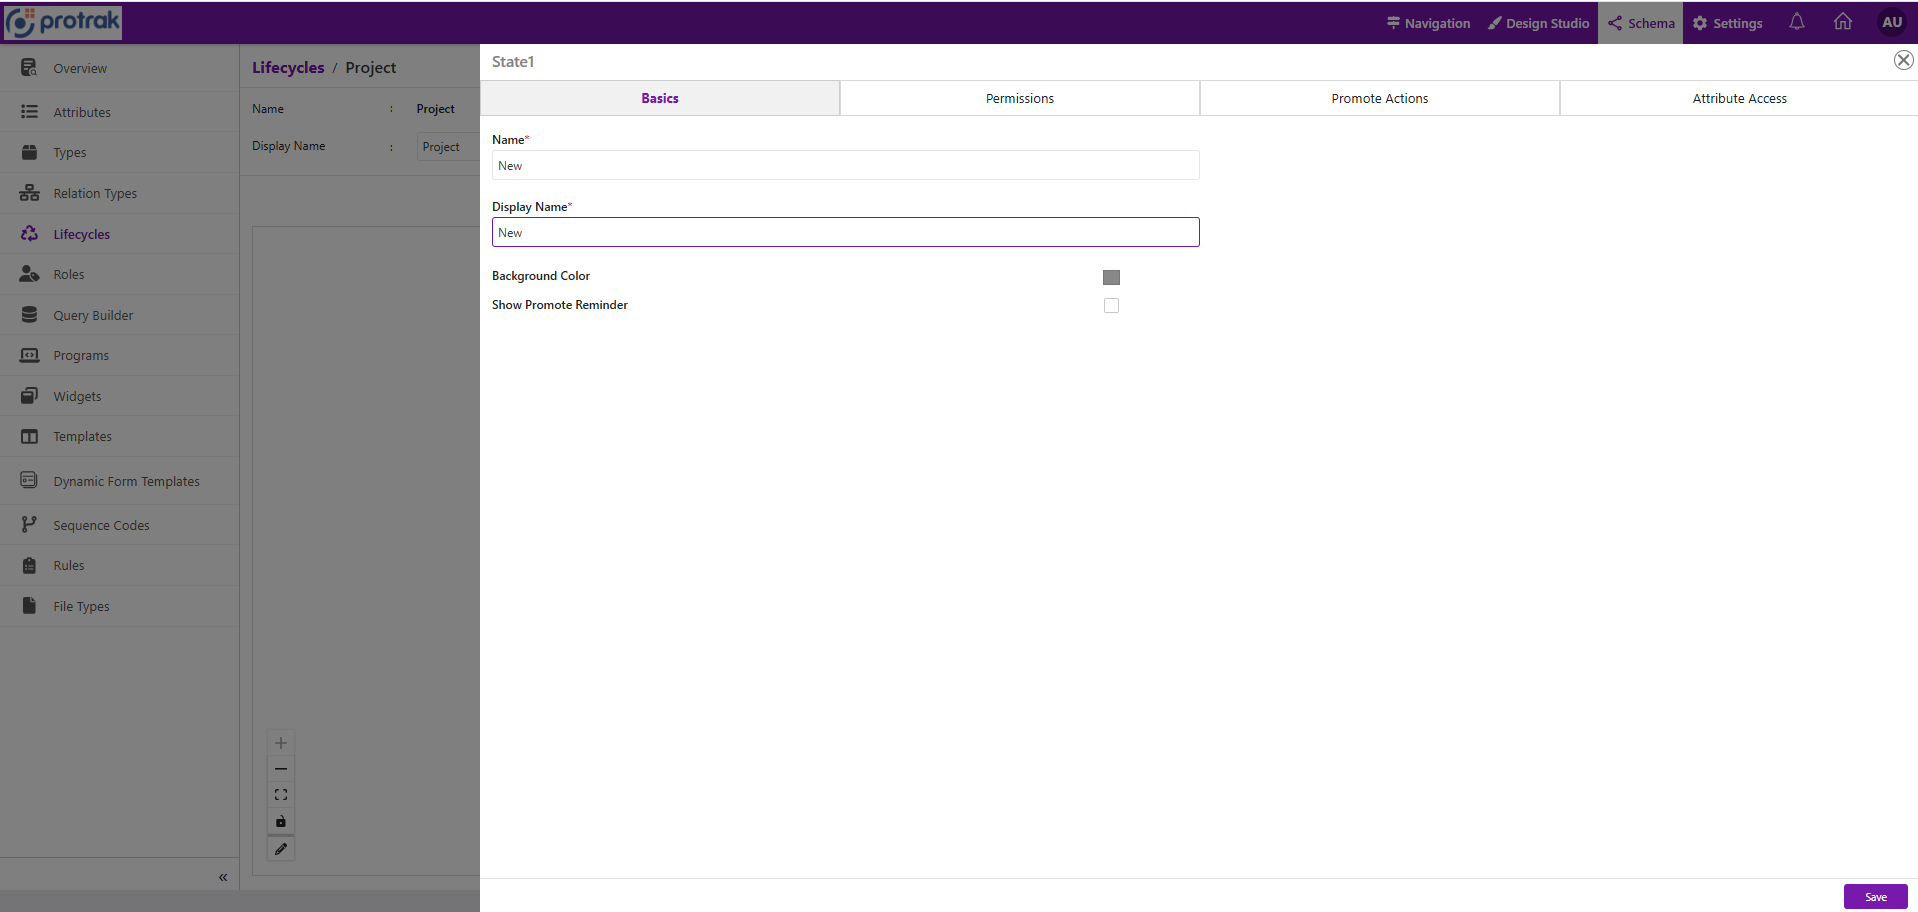
-
Add the other states in the order users should understand the process. CLick on the
Add Statebutton.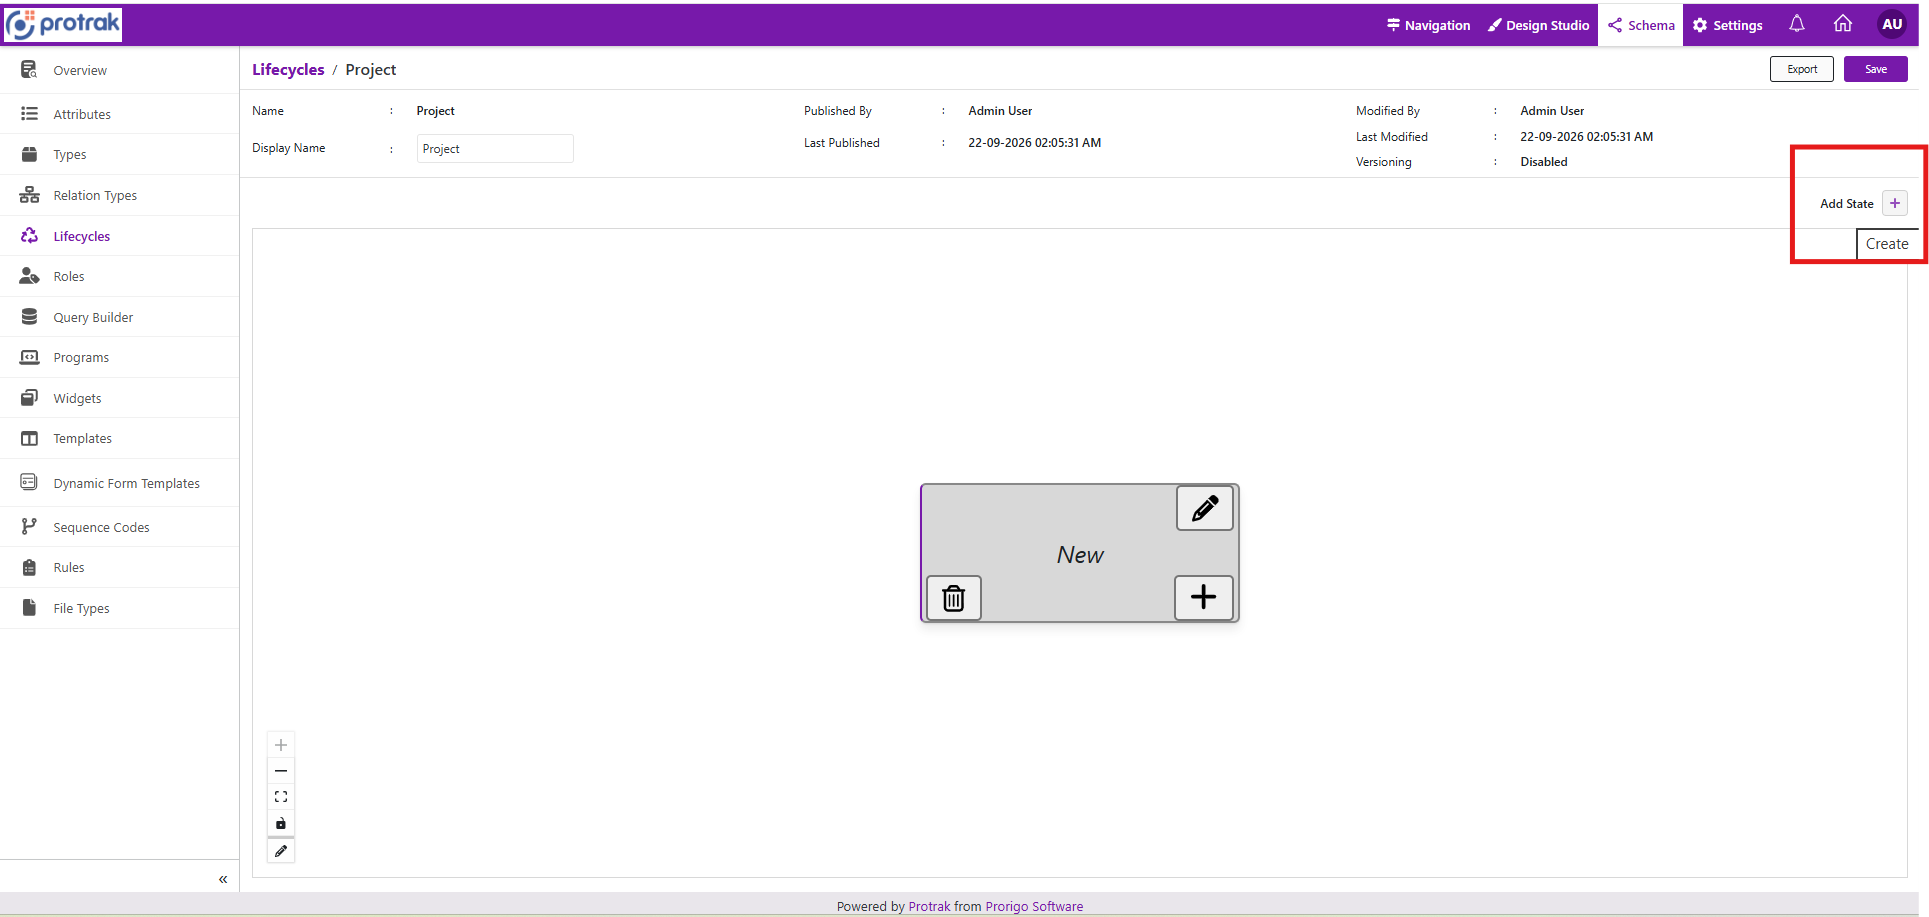
-
Enter
Activeas the name andActiveas the display name. Change the background color to blue, then clickAdd.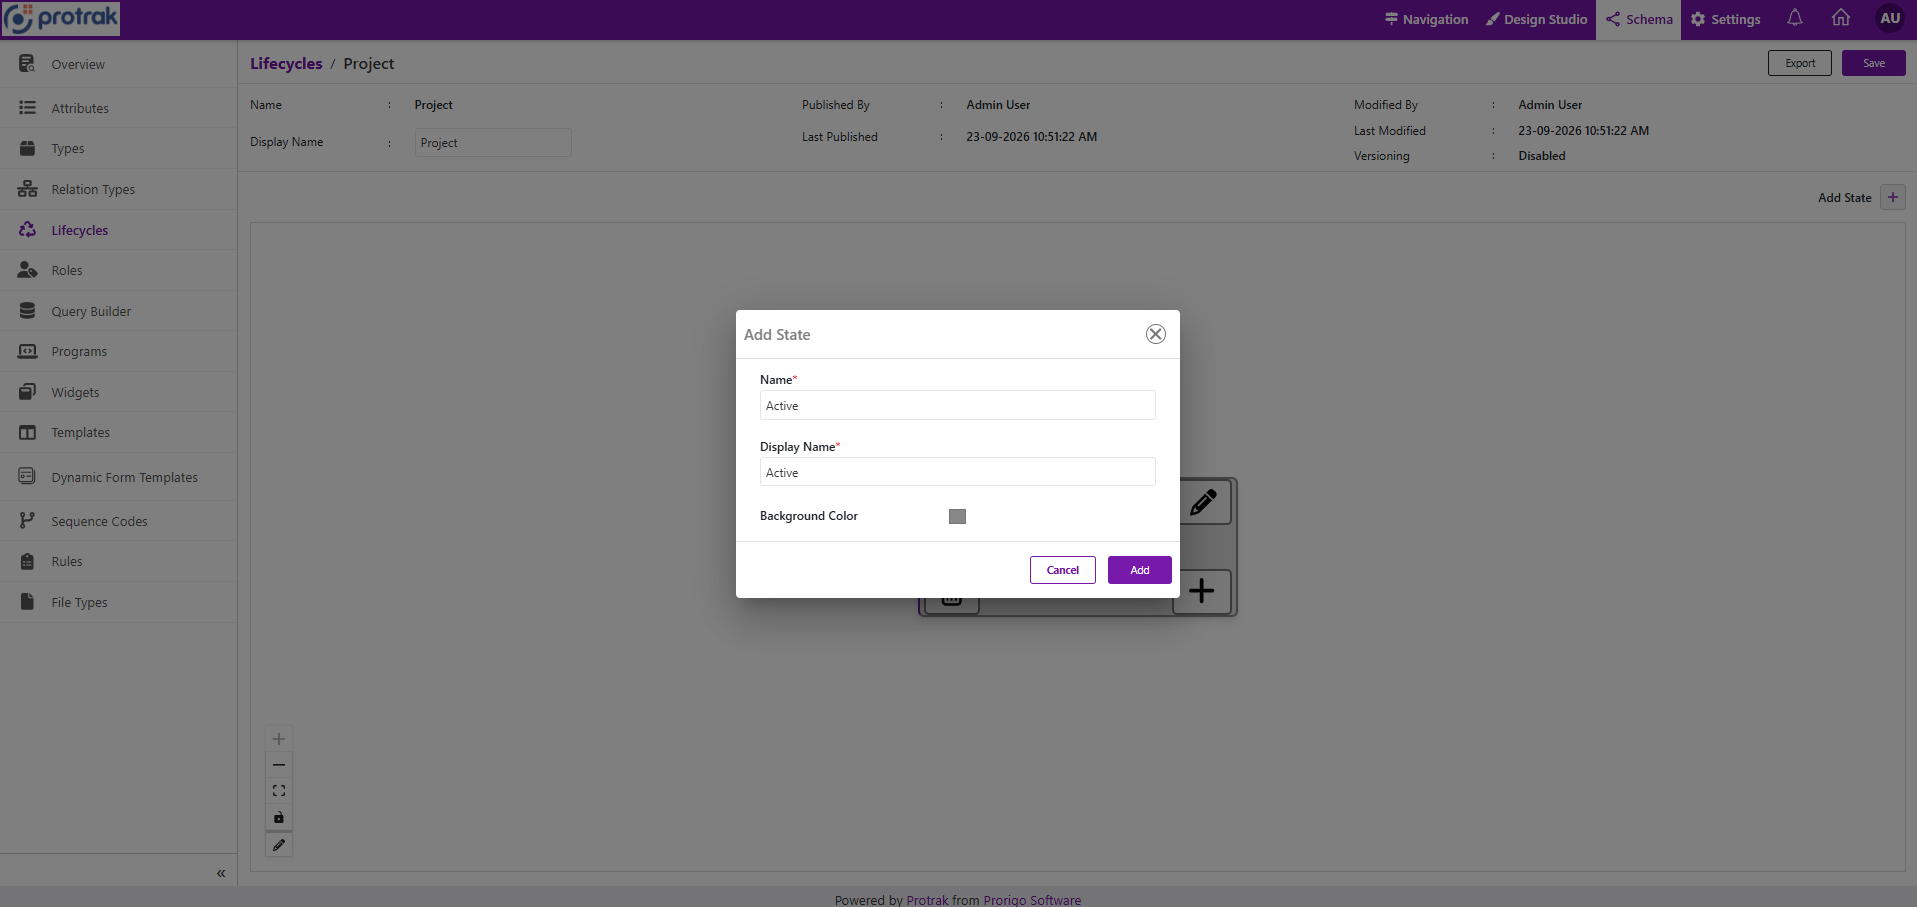
-
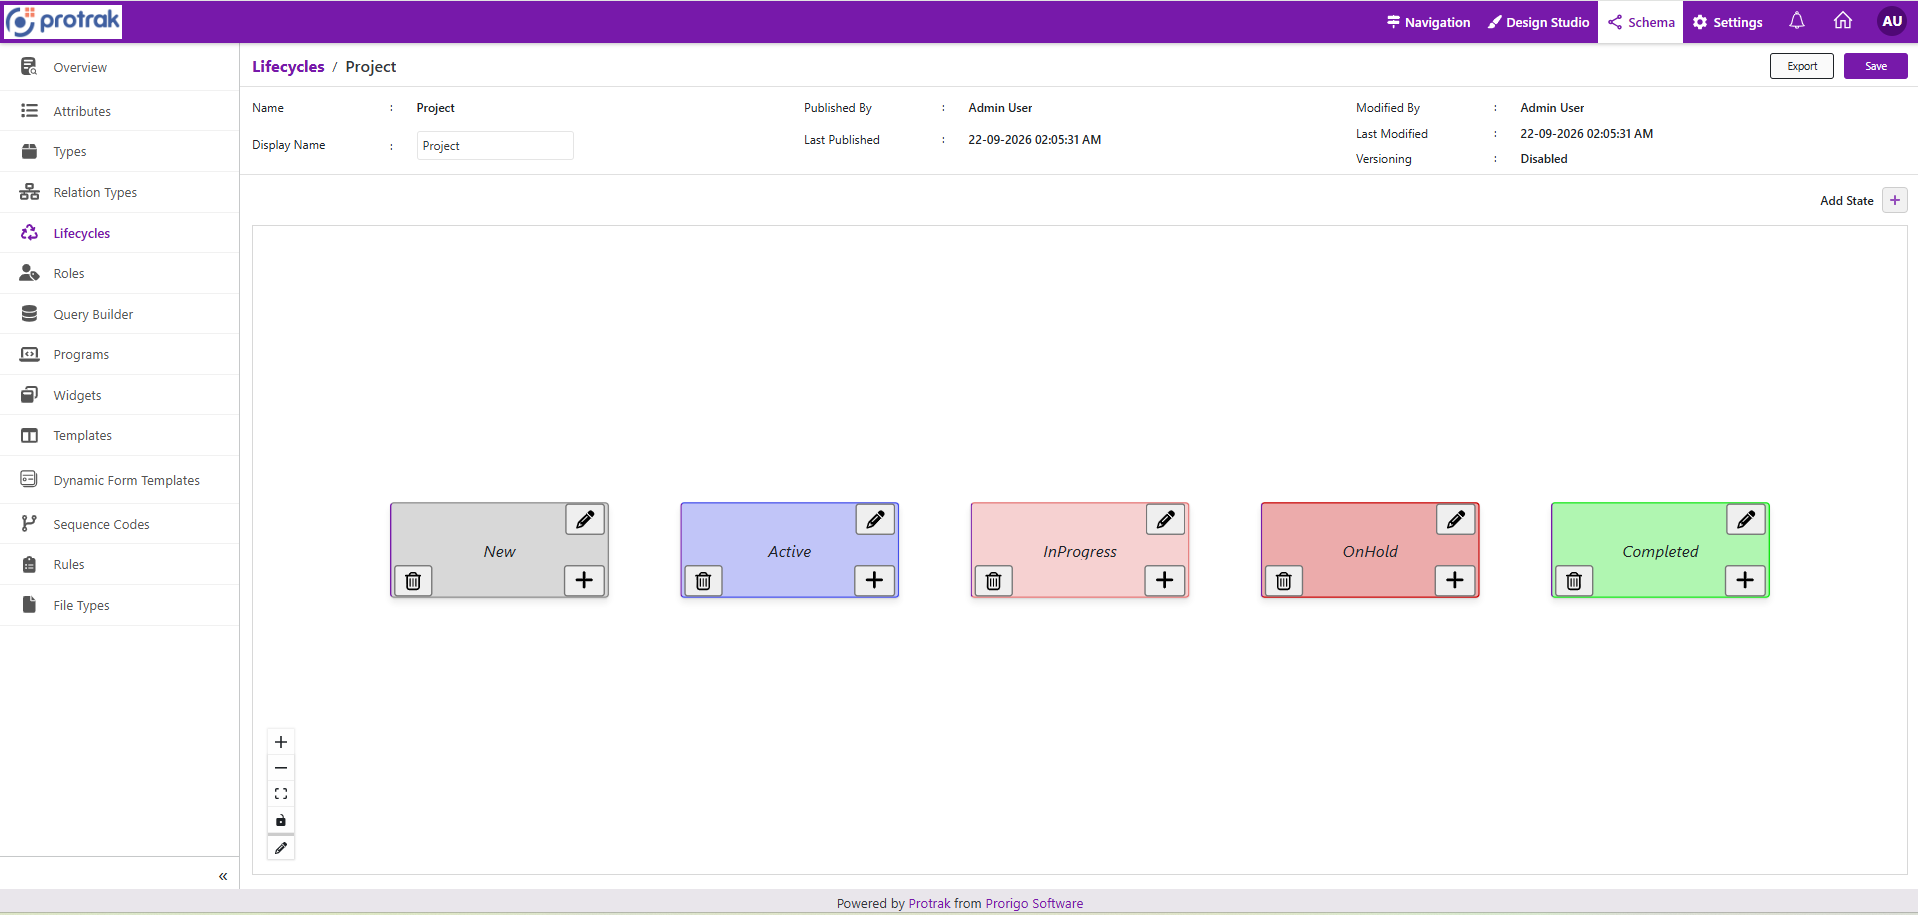
Similarly add all the states required.
-
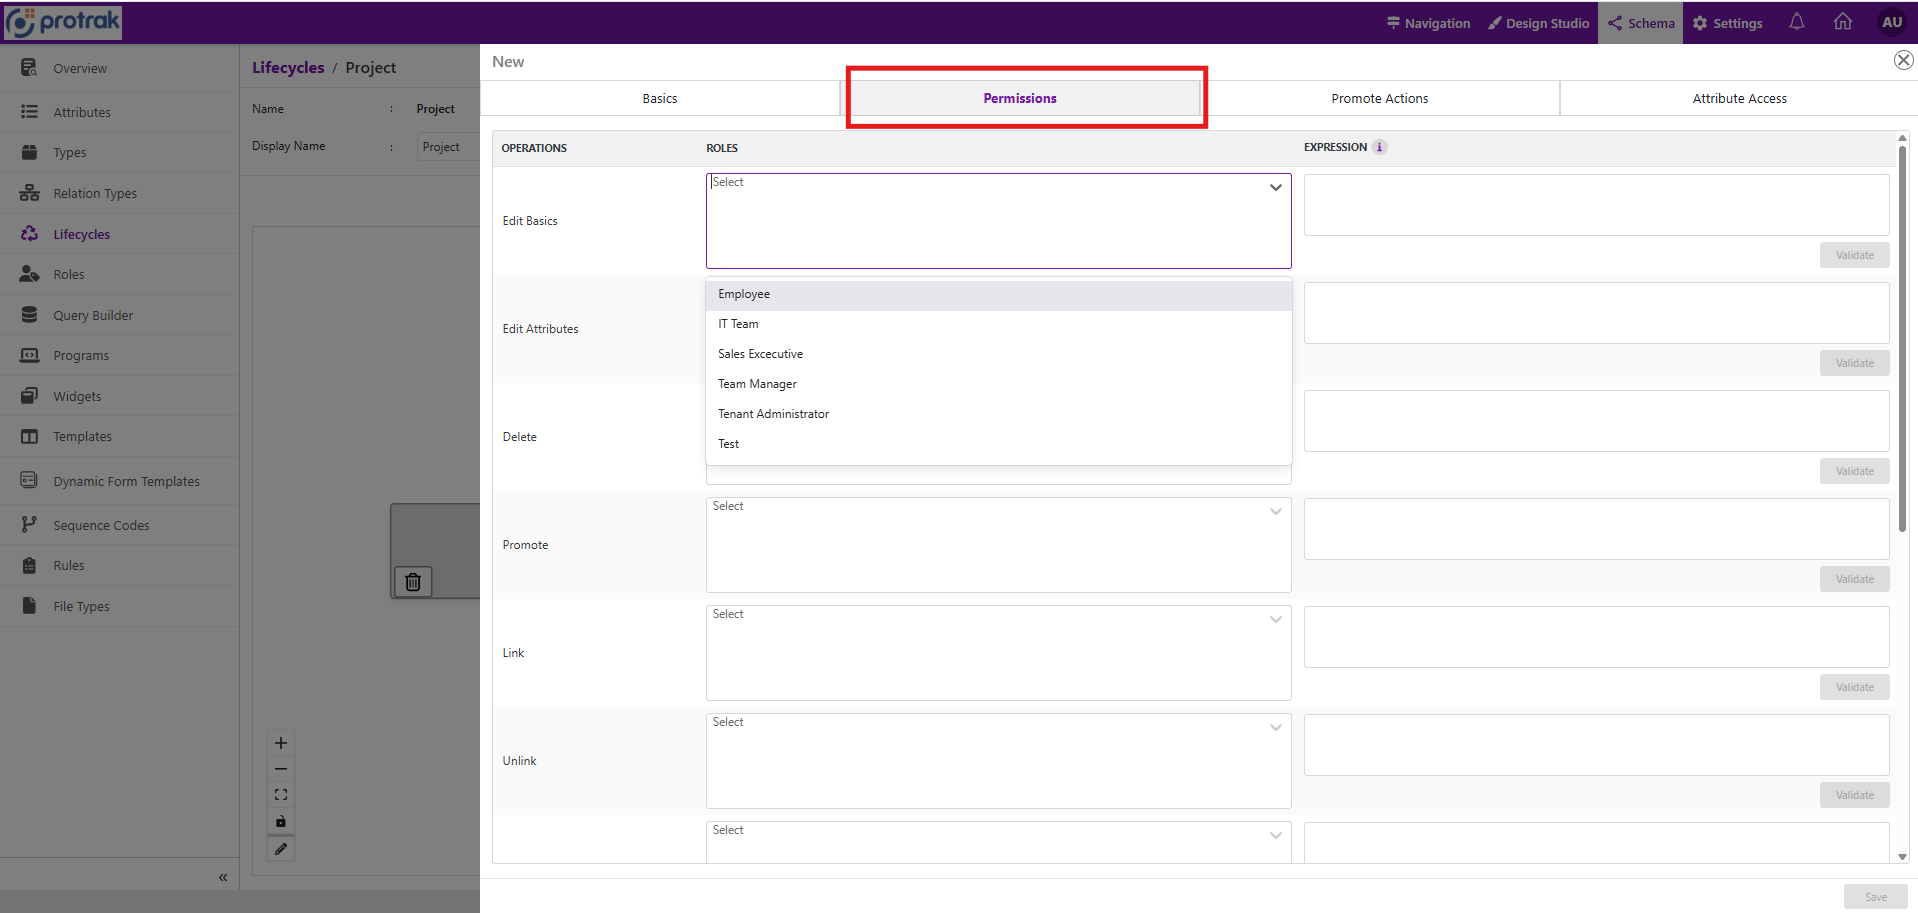
Configure state-wise permissions for viewing, editing, linking, unlinking, deleting, and promoting.
-
In the
Permissionstab, configure the expression column for permissions. Users can perform operations on an instance only when they have the role specified for the permission and the configured expression evaluates totruefor that instance. Protrak expressions follow C# language syntax. For example, expressions can use theSystem.String,System.DateTime, andSystem.Mathnamespaces.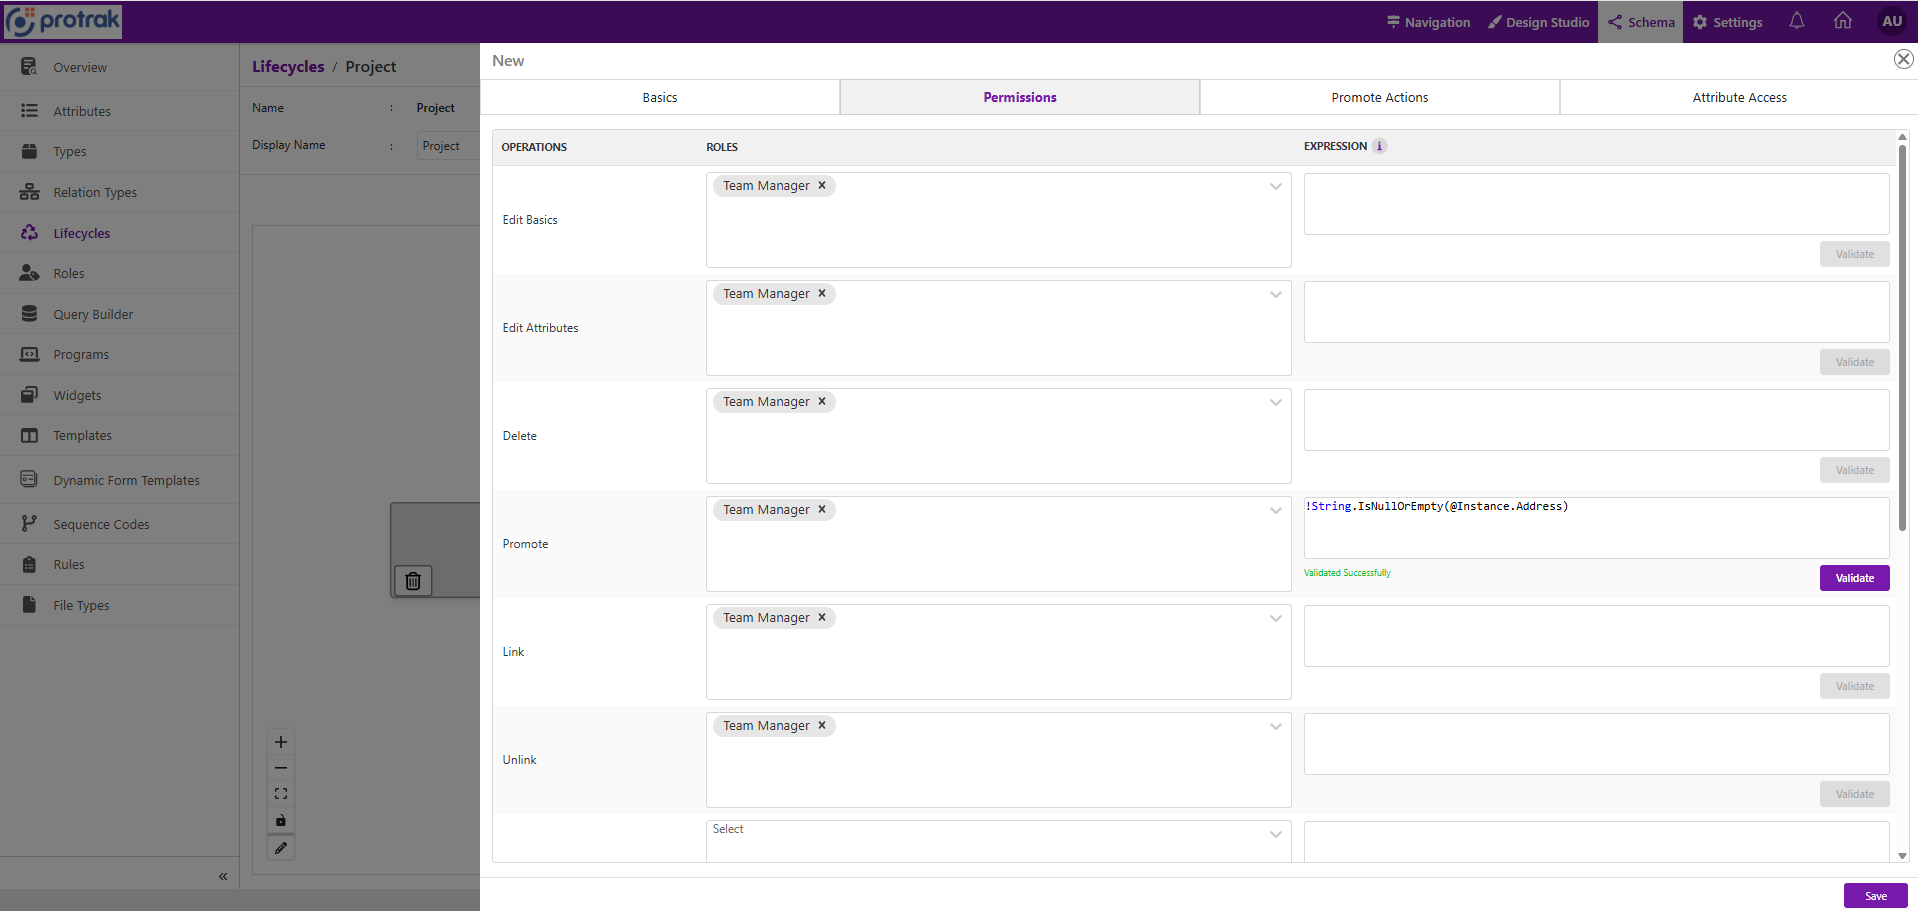
-
Add a promote action for each state. In the
Promote Actiontab, clickCreateto add a new promote action.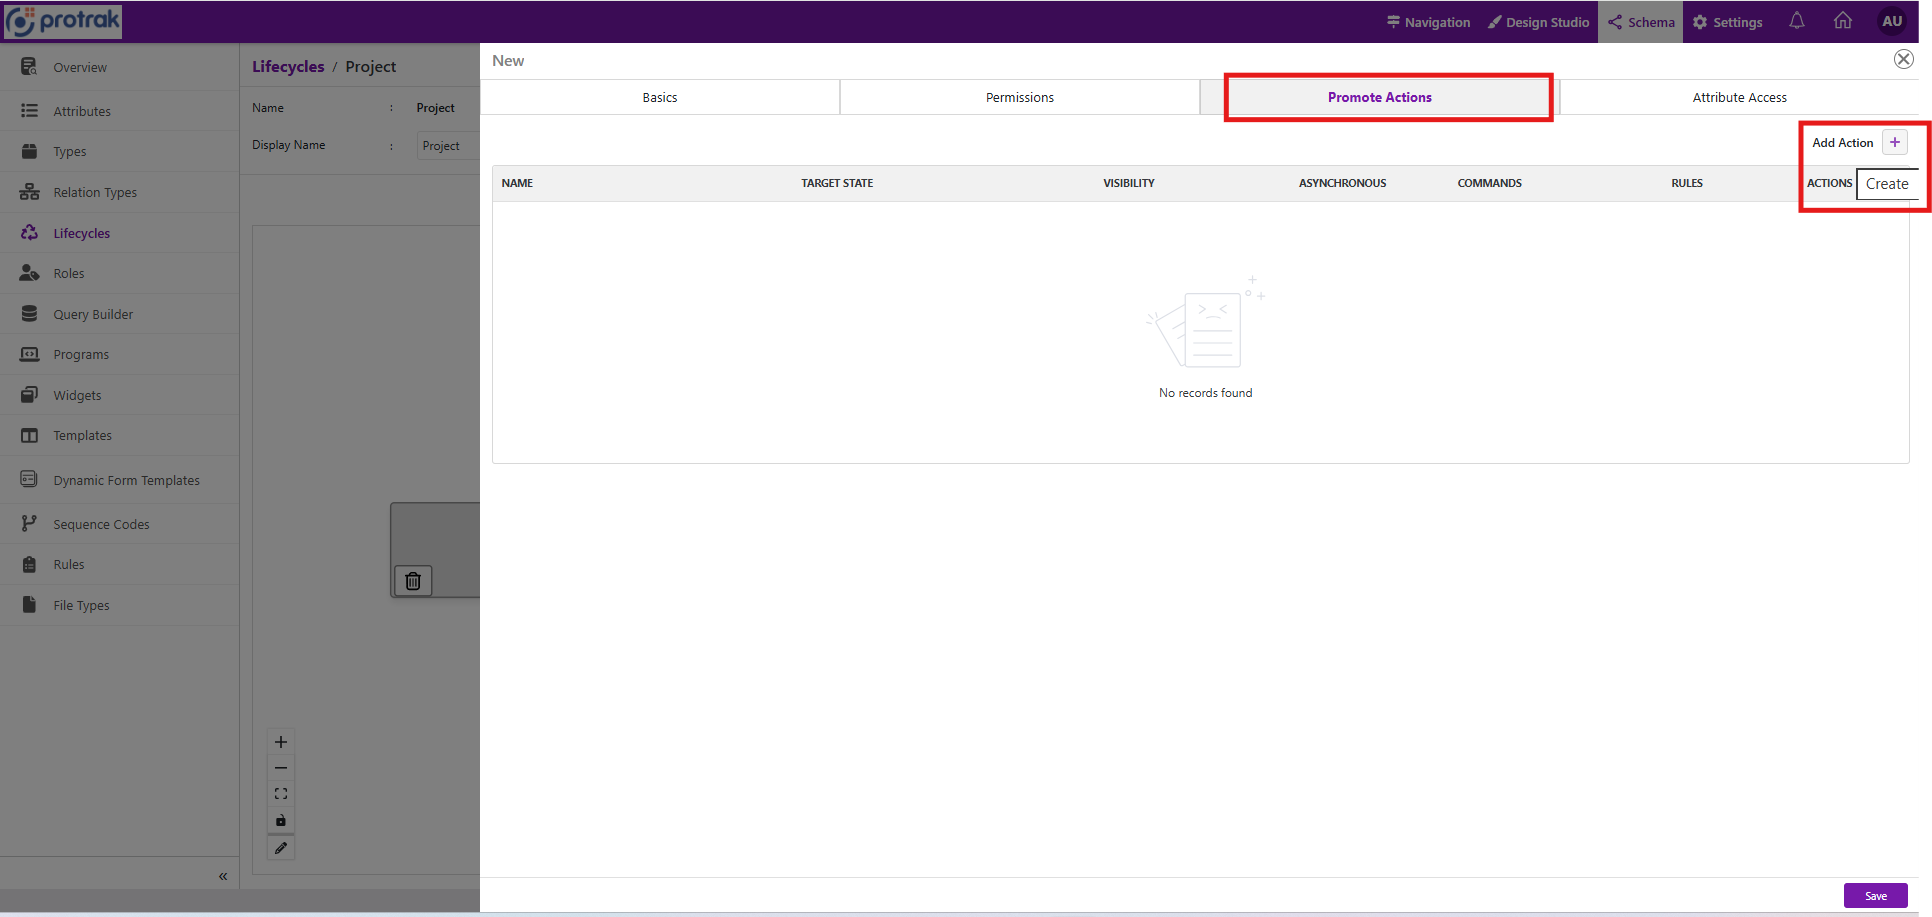
-
Enter the promote action details. Add the name and display name, select the action type, choose the target state, and configure visibility or an access policy rule. If required, enable options such as mobile-scan-only promotion, version creation, asynchronous execution, or geofence-only promotion. Configure the promote comment mode, comment display label, and promote success message, then click
Add.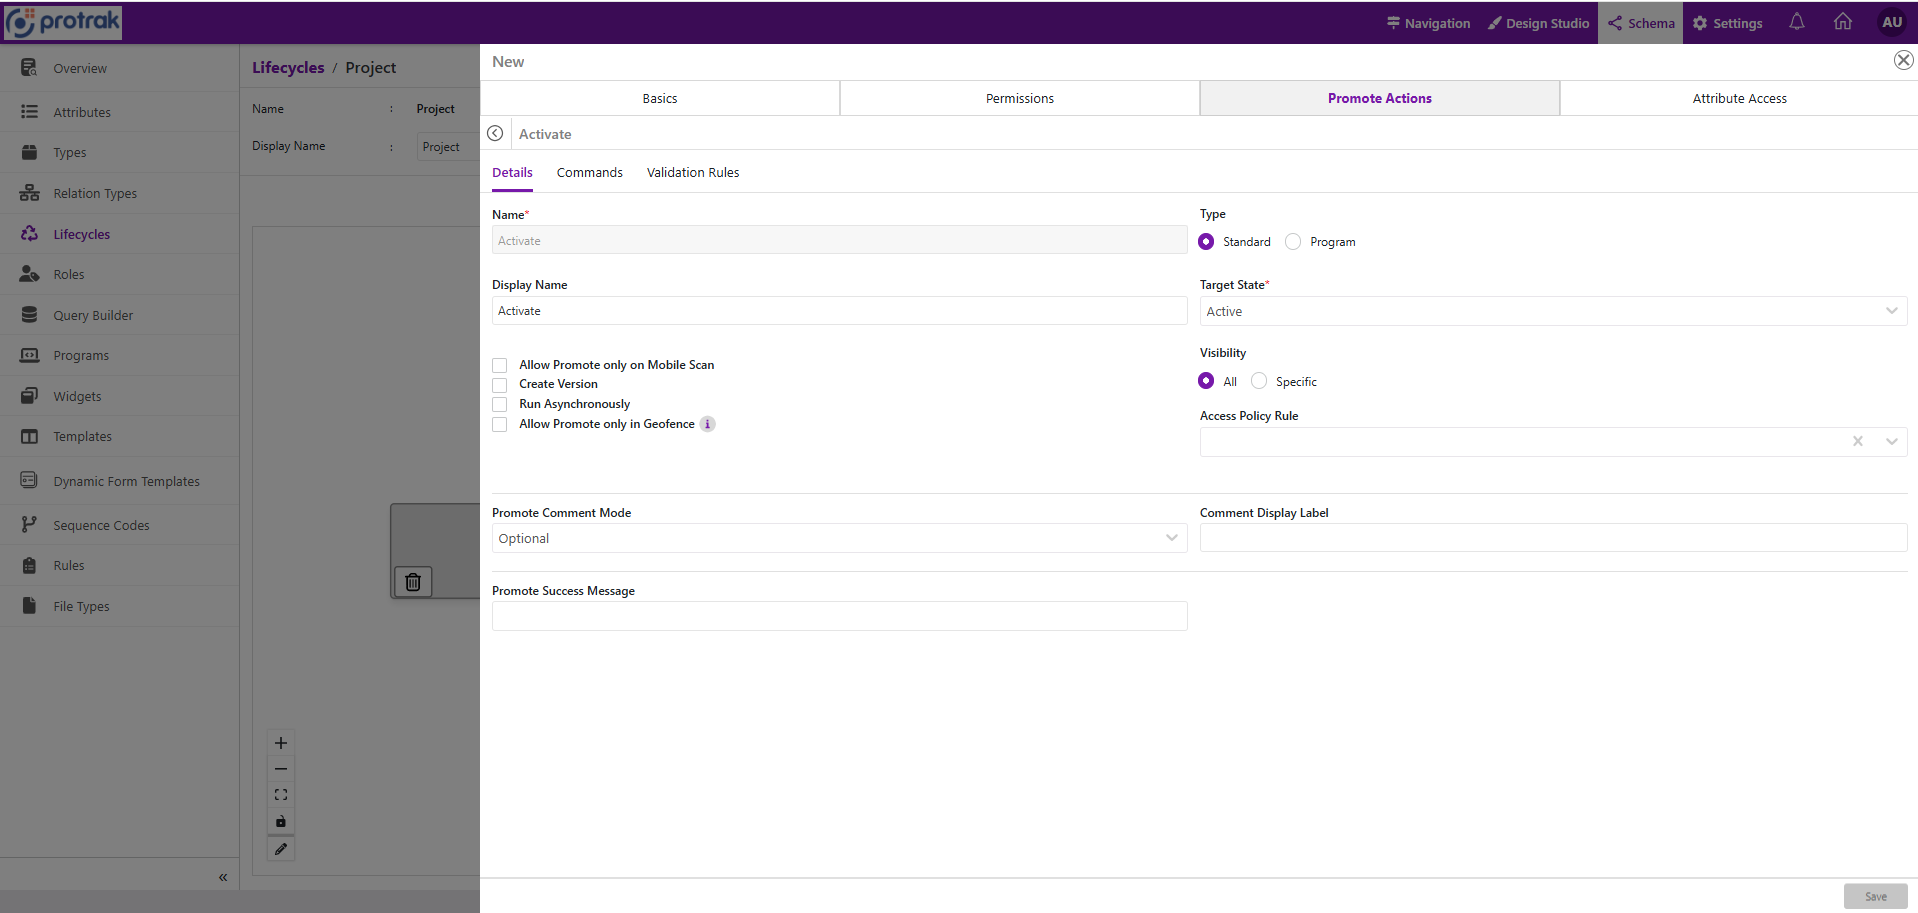
-
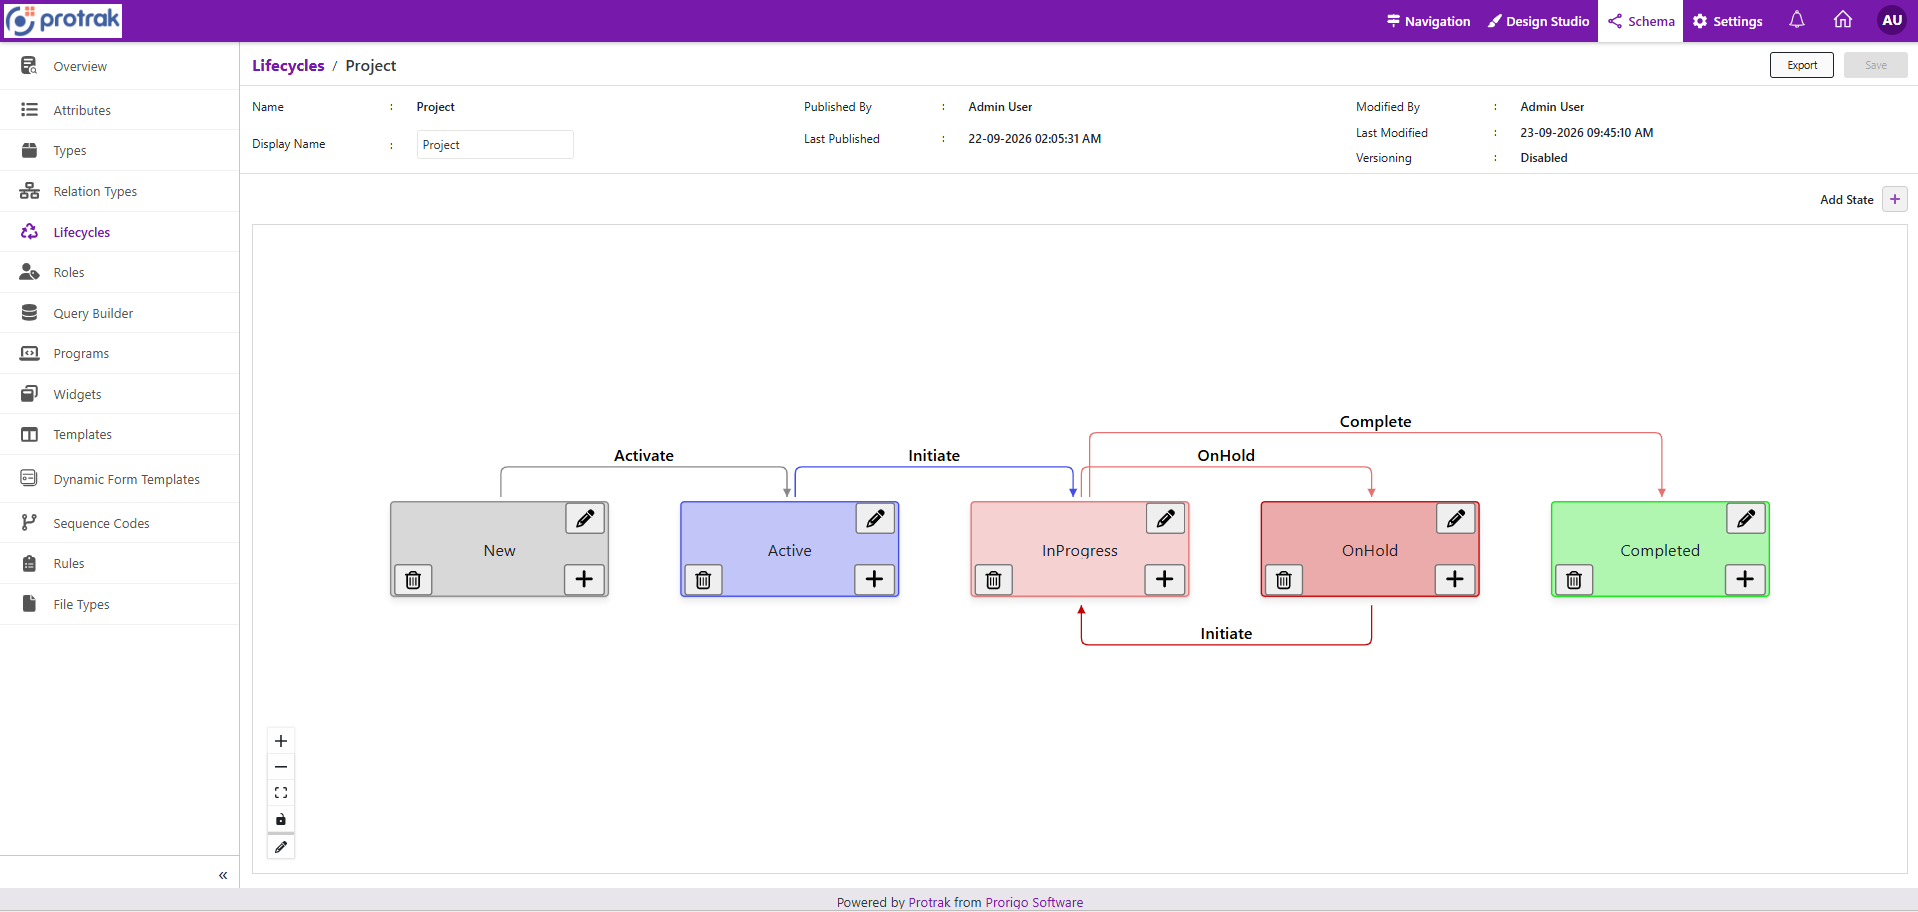
After adding all the promote actions, project lifecycle looks as below.
-
In the
Attribute Accesstab, configure which attributes are viewable and editable for the lifecycle. SelectAllto allow access to every attribute, or selectSpecificand choose the attributes that users can view or edit in this lifecycle state.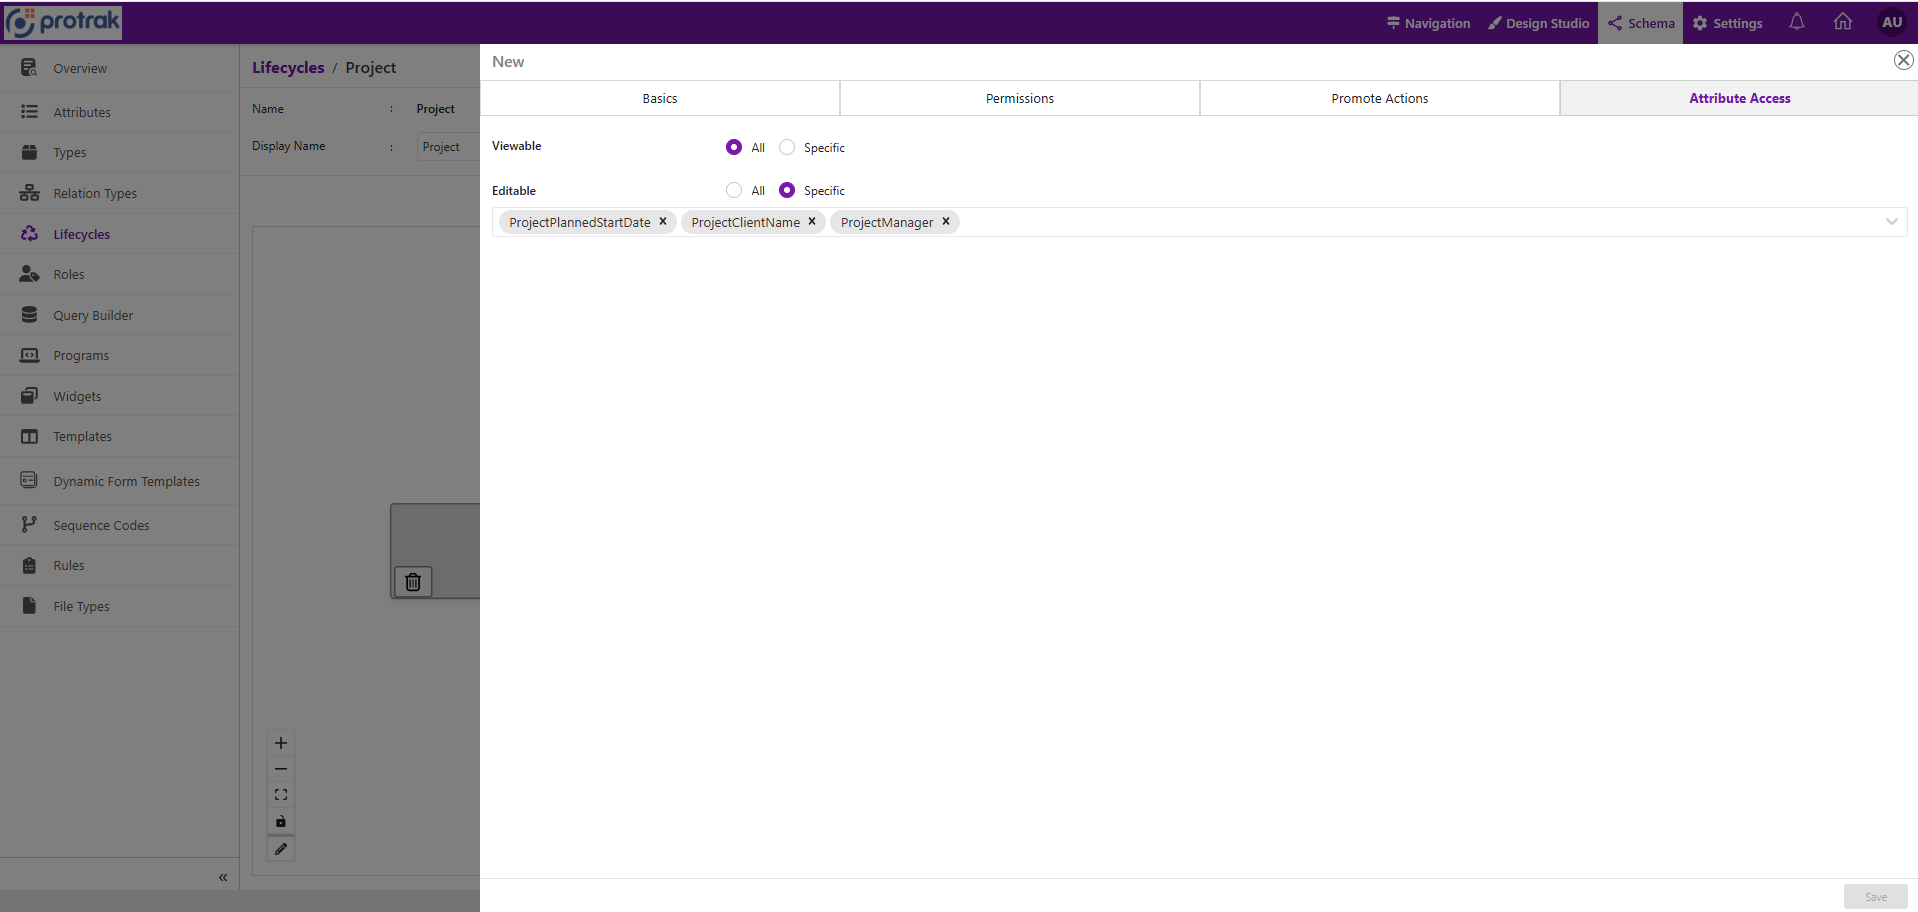
-
Assign the lifecycle to a type from the Type Details tab.
-
Validate the flow with users in each role, including blocked actions and required comments.
Notes
- Use clear state names that describe the record's status, such as Draft, In Review, Approved, or Completed.
- Use promote action names that describe what the user does, such as Submit, Approve, Reject, or Complete.
- Keep lifecycle permissions aligned with the business process so users can only perform the actions expected for their role and state.
- Test the lifecycle after saving, especially role restrictions, required comments, commands, and terminal states.