Sticker Forms
A Sticker form is a Design Studio form mode for designing a physical print label — a fixed physical size (for example 2"×4") with a title, some fields, rich text, and a QR code. When an end user clicks Print Sticker on a record, Protrak renders your label with that record's real data and opens it for printing. A label can also be built for a relation widget, where it prints the values stored on the link between two records as well.
A regular form (Create / Edit / View) is a screen layout that adapts to devices. A Sticker form is a print layout — one fixed physical size, designed to look right on the printed label.
This page covers designing the label itself. To make it available to users you attach it to a Print Sticker action — see Print Sticker Action.
Step 1: Create the form and set Form Mode
- Go to Design Studio → Forms and click Create.
- Fill in Form Name, Display Name, and Type Name (as with any form).
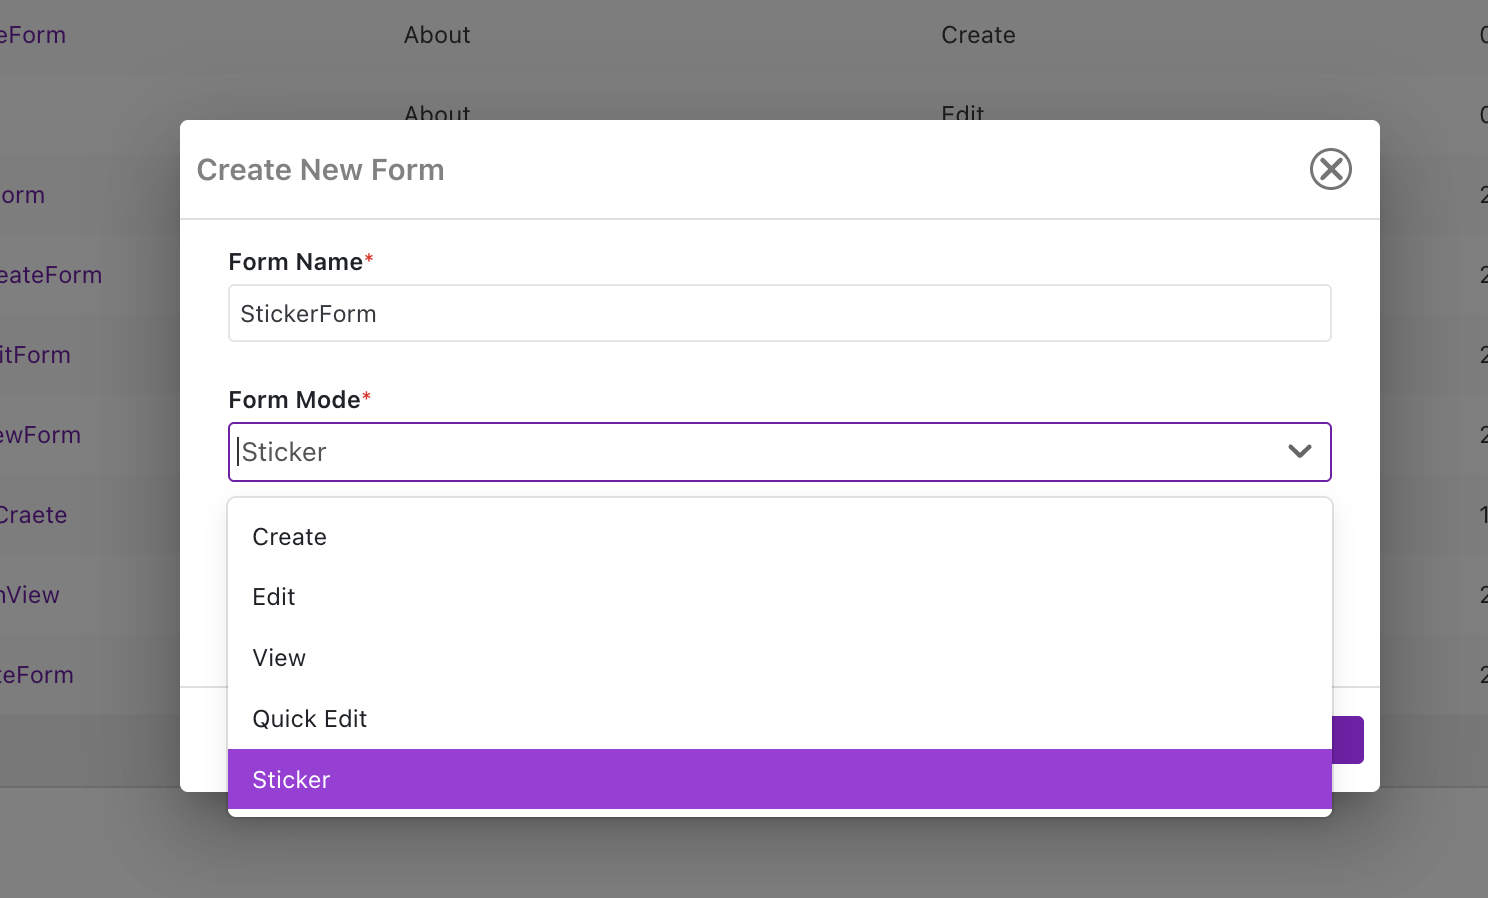
- In the form's Form Details settings, open the Form Mode dropdown and choose Sticker.
| Form Mode | What it builds |
|---|---|
| Create / Edit / View | Responsive screen layout (desktop / tablet / mobile) |
| QuickEdit | Compact edit popup |
| Sticker | Fixed-size physical print label |
Choosing Sticker swaps the multi-device canvas for a single fixed-size label canvas and reveals the Sticker settings.
Step 2: Choose the Form Scope
Form Scope tells Protrak what the label is printed from — a record on its own, or a record as it appears inside a relation widget.
| Scope | Use it for | Extra required field |
|---|---|---|
| Type | Print Sticker actions on dashboard rows, record view pages, and dashboard bulk actions — the label shows the record's own data | — |
| Relation | Print Sticker actions on relation widget rows and relation widget bulk actions — the label can show the related record's data and the relation attributes stored on the link | Relation Type |
Choosing Relation reveals a Relation Type dropdown. Pick the relation this label is built for. The form is then only offered on Print Sticker actions of relation widgets built on that same relation type.
Form Scope, Type Name, and Relation Type are set at creation time and locked once the form is first saved — decide these before you start building.
A relation widget's Sticker Form dropdown lists only Relation-scoped sticker forms for its related type and relation type. A Type-scoped label will not appear there — build a Relation-scoped one instead. The reverse is also true: dashboards and view pages only offer Type-scoped labels.
Step 3: Choose the sticker size
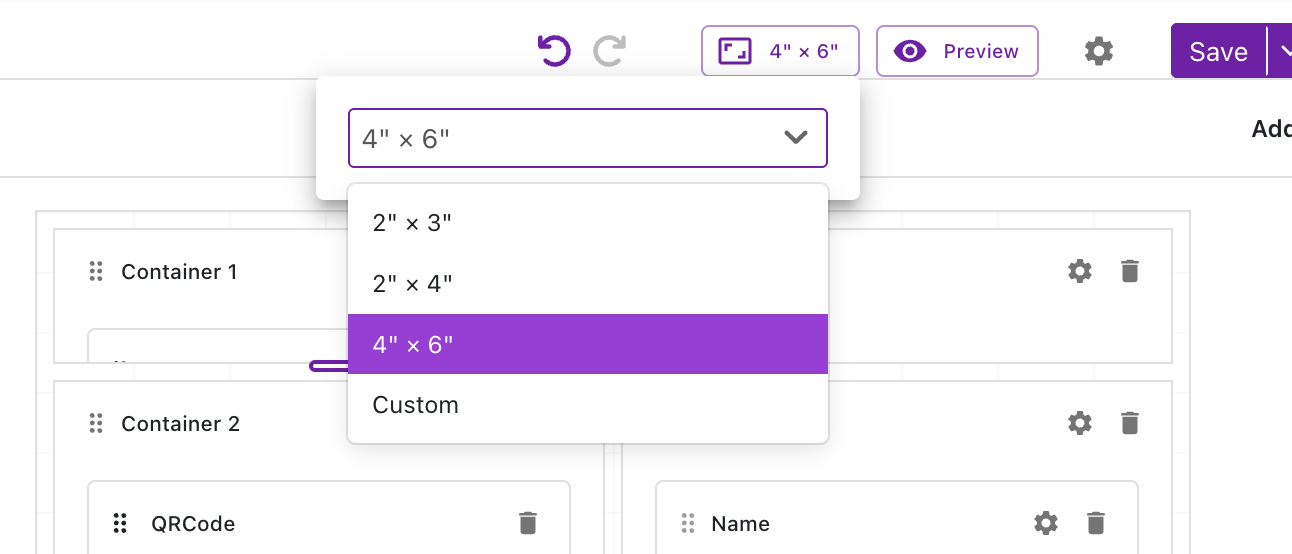
The Sticker Size field (required) sets the physical dimensions of the label.
| Size option | Dimensions | Notes |
|---|---|---|
| 2" × 3" | 2 in tall × 3 in wide | Standard |
| 2" × 4" | 2 in tall × 4 in wide | Standard — default for new sticker forms |
| 4" × 6" | 4 in tall × 6 in wide | Standard |
| Custom | You enter Height, Width, and Unit | See bounds below |
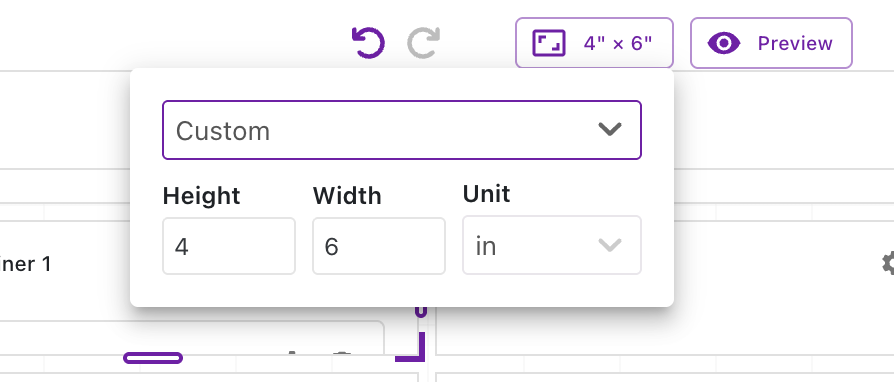
Custom size reveals Height, Width, and a Unit dropdown (in or mm). Values must stay within these bounds or Save is blocked:
| Unit | Minimum | Maximum |
|---|---|---|
Inches (in) | 0.5 | 8 |
Millimetres (mm) | 12 | 200 |
Out-of-range values block Save with a message like: "Width and height must be between 0.5 and 8 inches." Switching the unit re-converts the physical size — a 4 in width becomes ~101.6 mm.
Step 4: Sticker settings (border)
| Setting | Type | Default | Description |
|---|---|---|---|
| Show Border | Checkbox | Off | Draws a border around the whole label. When on, reveals the two settings below. |
| Border Thickness | Number (1–50) | 1 | Border line thickness in pixels. |
| Border Color | Color picker | #E0E0E0 (light gray) | Border color. |
Step 5: Build the label
Add containers and drop widgets into them — just like a regular form — but only these widgets are available on a sticker:
| Widget | Purpose |
|---|---|
| Title (Text) | A heading or static label |
| Separator | A dividing line |
| Rich Text | Formatted text |
| QR Code | Scannable QR code — drag onto the label, auto-sizes to its container |
Type attributes can also be dragged on as fields. The Actions field is not available on stickers.
By default the QR Code widget encodes the record's Protrak identity — open its ⚙ settings to point it at a different Text attribute instead (a serial number, partner reference, or a link). See QR Code Widget for the full configuration reference.
Relation attributes (Relation scope only)
When Form Scope = Relation, the component library gains a Relation Attributes group alongside the type's own attributes.
| Group | Where the value lives |
|---|---|
| Attributes | On the related record itself — the same value everywhere that record appears |
| Relation Attributes | On the link between the parent record and the related record — a different value for every link |
Drag them onto the label exactly like ordinary fields. A pallet label can then print the item's part number (a record attribute) next to the quantity and bin assigned on that specific link (relation attributes).
You can also point the QR Code widget's Encode from attribute setting at a relation attribute. Text relation attributes of the chosen relation type appear at the bottom of that dropdown, below the type's own text attributes, so the familiar list stays on top.
A field you place on the label is fetched for printing whether or not the relation widget shows it as a column. You do not need to add a column just to print a value.
Height is always "fit content"
Because a sticker is a fixed physical size that can't scroll or grow, two height controls are forced on and locked in Sticker mode:
- The form-level "All containers to fit content" checkbox — always on.
- Each container's Height Behavior — always Fit to content.
This keeps the design honest about what actually fits on the label. You still control layout with Width and by arranging containers.
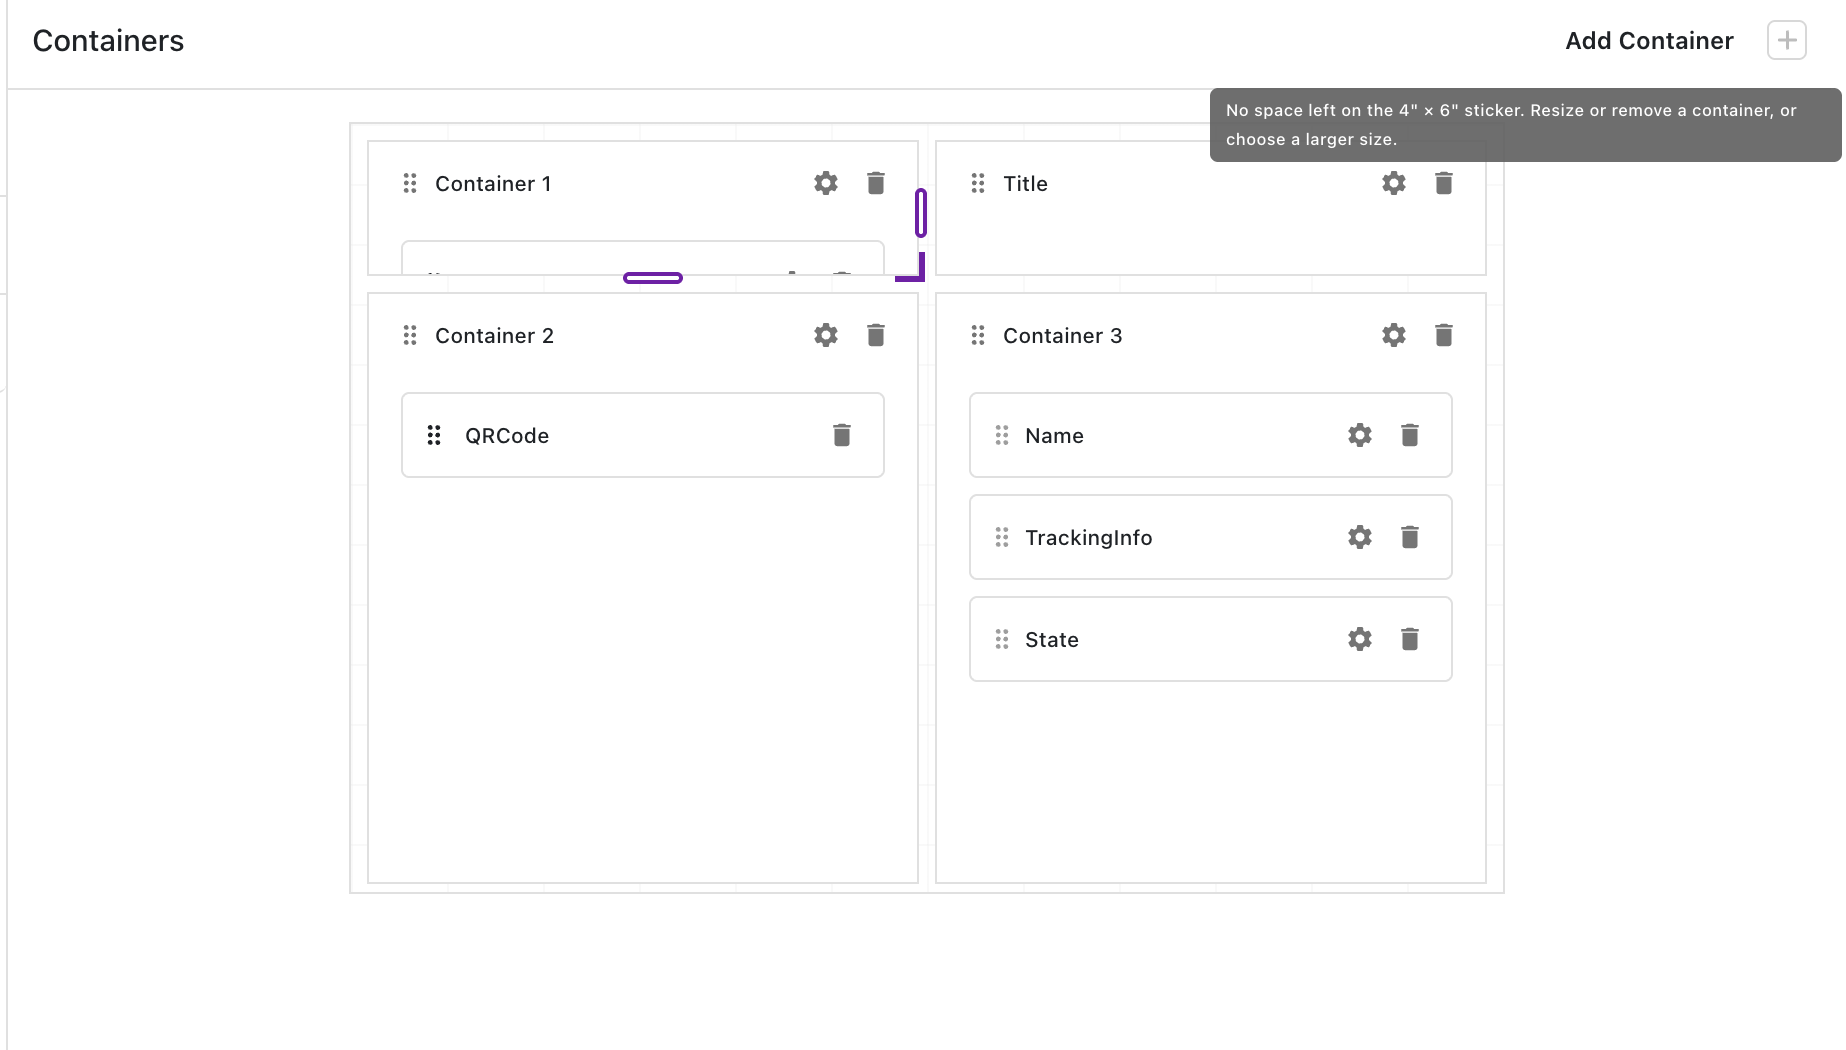
Running out of space
When the label is full, Add Container is disabled with a tooltip like: "No space left on the 2"×4" sticker. Resize or remove a container, or choose a larger size."
Shrinking the sticker below its existing containers is also blocked with a message like: "Can't resize to 2"×4" — one or more containers no longer fit. Resize or remove them first, or choose a larger size."
Step 6: Preview the label
The Sticker canvas has a Sticker toolbar instead of the usual device selector:
- A size badge (showing current dimensions) — click it to open a popover and change the size live. This is preview-only and does not change the authored form size.
- A Preview button — opens the Sticker Preview dialog, rendering your label with real record data using the same engine that prints it.
The preview needs at least one existing record of the type to load real data. If none exist yet, you'll see a message asking you to create a record first.
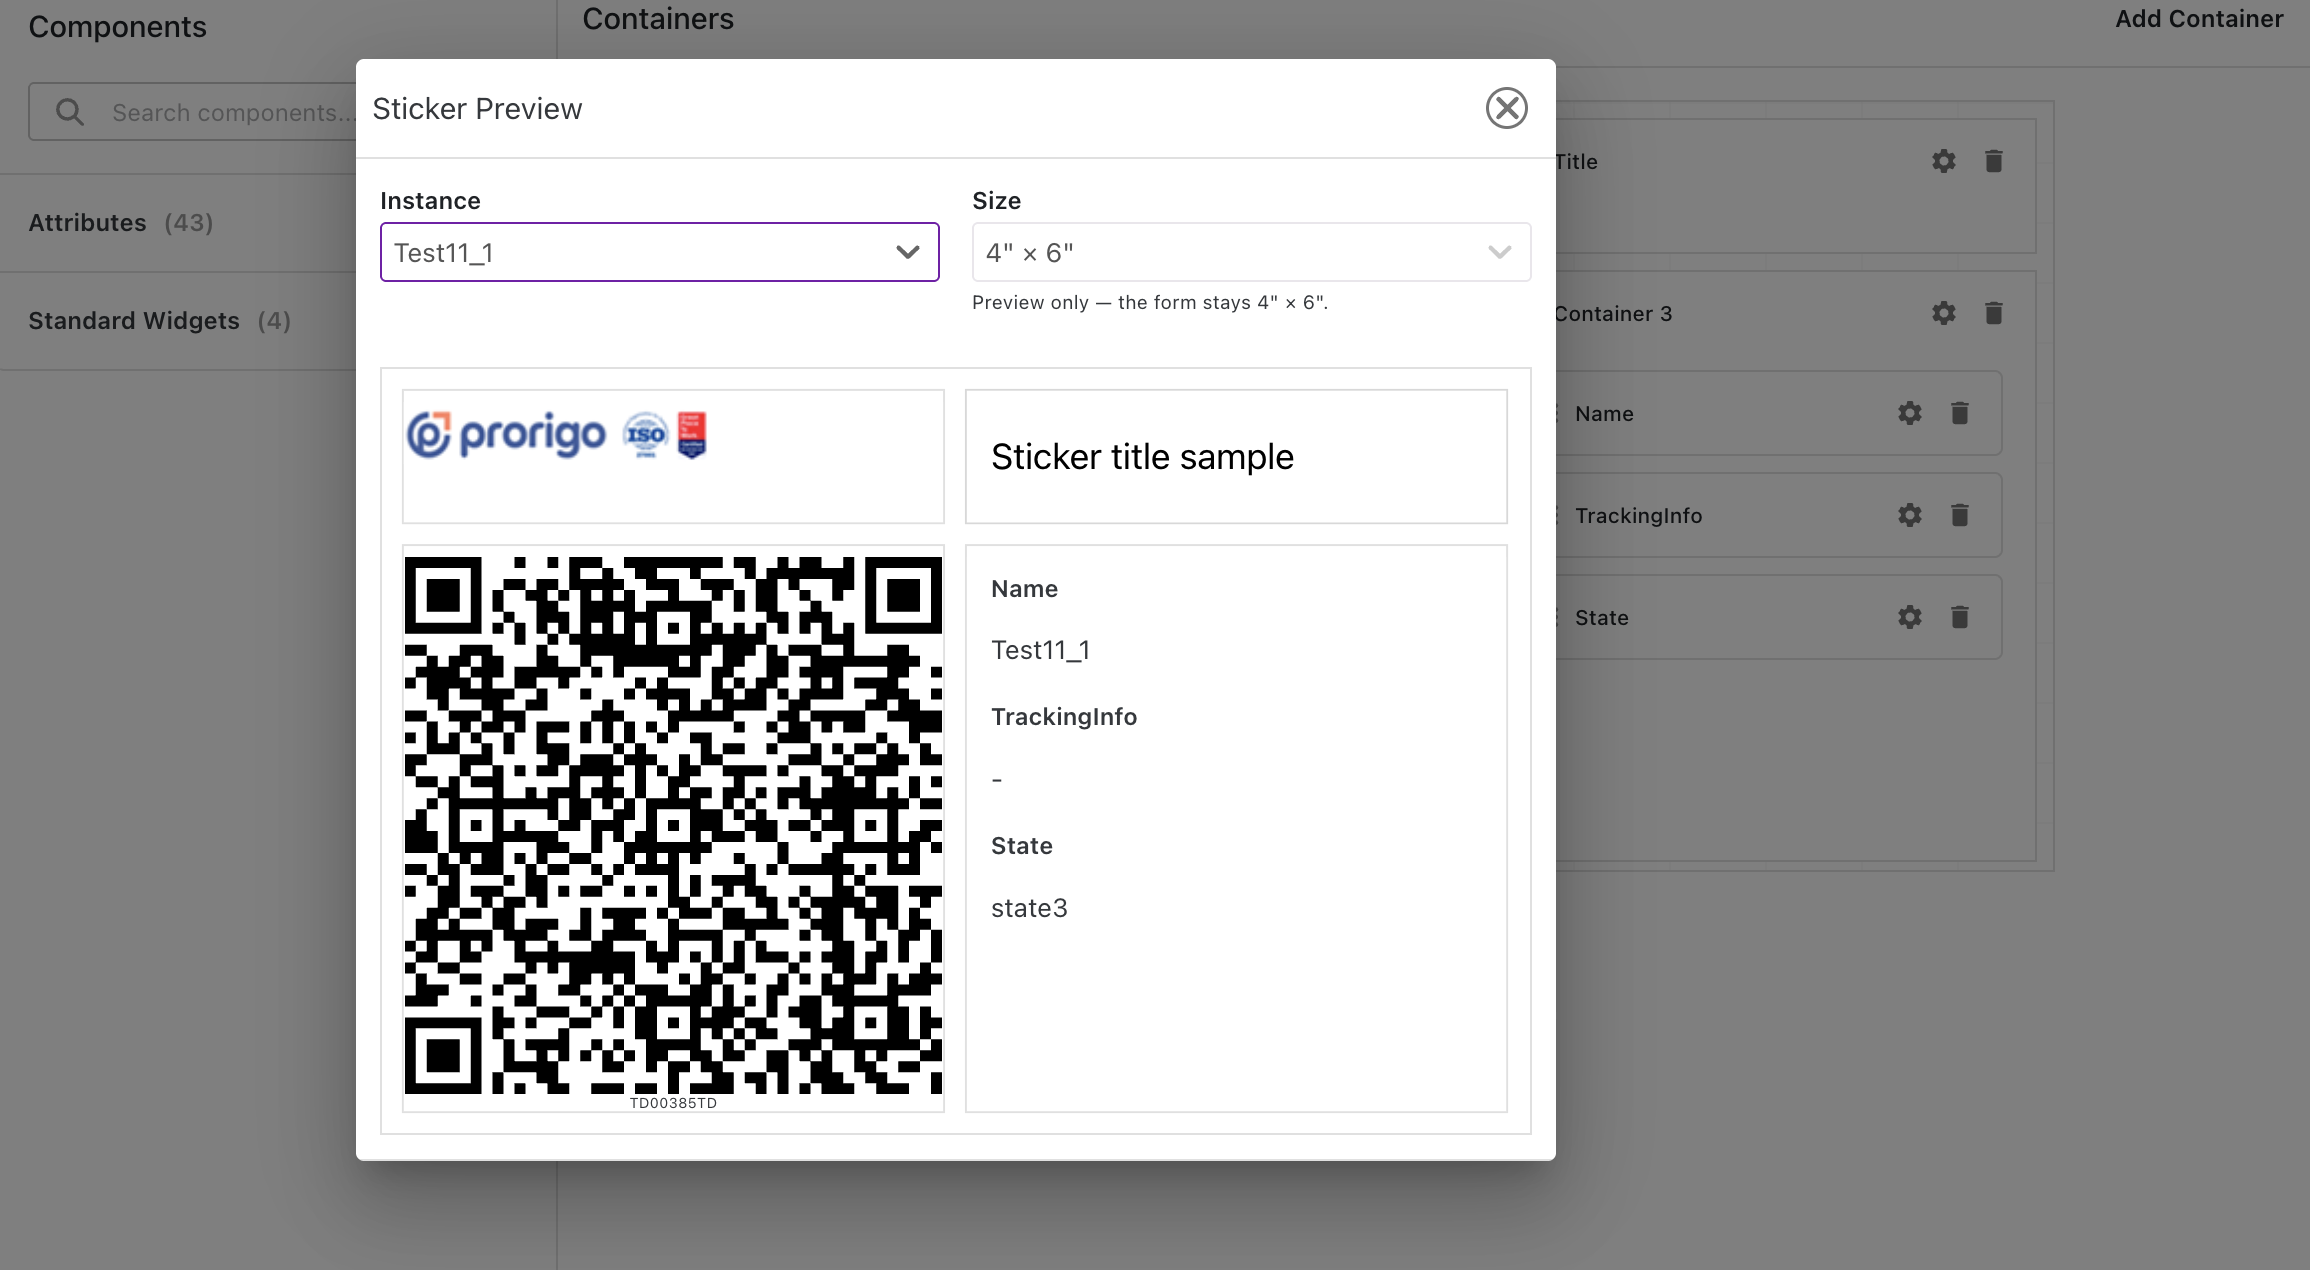
What the preview cannot show on a Relation-scoped label
The preview picks a record to draw with — it does not pick a link. Relation attribute values belong to a link, so in the preview there is simply no link to read them from. Two things follow, and both are expected:
| In the preview | What you see | Why |
|---|---|---|
| A relation attribute field | The label and an empty value | The value lives on the link between two records. The preview has only picked one record, so there is no link to take the value from. |
| A QR Code widget set to encode a relation attribute | Nothing at all — a blank space where the QR would be | A QR code has to encode something. With no link, there is no value to encode, and Protrak draws no code rather than an empty one. This is the same rule as any QR whose attribute is empty. |
The Sticker Preview dialog shows a reminder line above the label for exactly this reason:
Relation attribute values come from the linked record, so they stay blank here.
Everything else previews normally — size, border, titles, rich text, separators, spacing, and the related record's own attributes. Use the preview to check the layout; check the values by printing from the relation widget itself.
Open a record that has this relation widget on it, link at least one record with relation attribute values filled in, and run the Print Sticker action there. That path fetches the link and prints the real values.
Limitations
| Constraint | Detail |
|---|---|
| Single fixed size | No device split. Grid rows are capped to the physical height. |
| Height always fit-content | "All containers to fit content" and container Height Behavior are forced on and locked. |
| Size bounds | Inches 0.5–8, millimetres 12–200. Out-of-range values block Save. |
| Scope is locked | Form Scope and Relation Type cannot be changed after the first save. |
| Relation values need a link | Relation attribute fields — and a QR encoding a relation attribute — are blank in the Design Studio preview, and blank at print time on any link where the value was never filled in. |
Next Steps
- Make this form available to users: Print Sticker Action
- Configure what the QR code encodes: QR Code Widget
- Build regular screen layouts: Forms
- Configure per-container height: Container Height
- Fill in relation attribute values on a link: Edit Relation Action & Link Popup
- Return to the module overview: Admin Configuration Guide