Print Sticker Action
Print Sticker is an action you add to dashboards, relation widgets, or record view pages. Users click it on one or more records and the label prints via the browser.
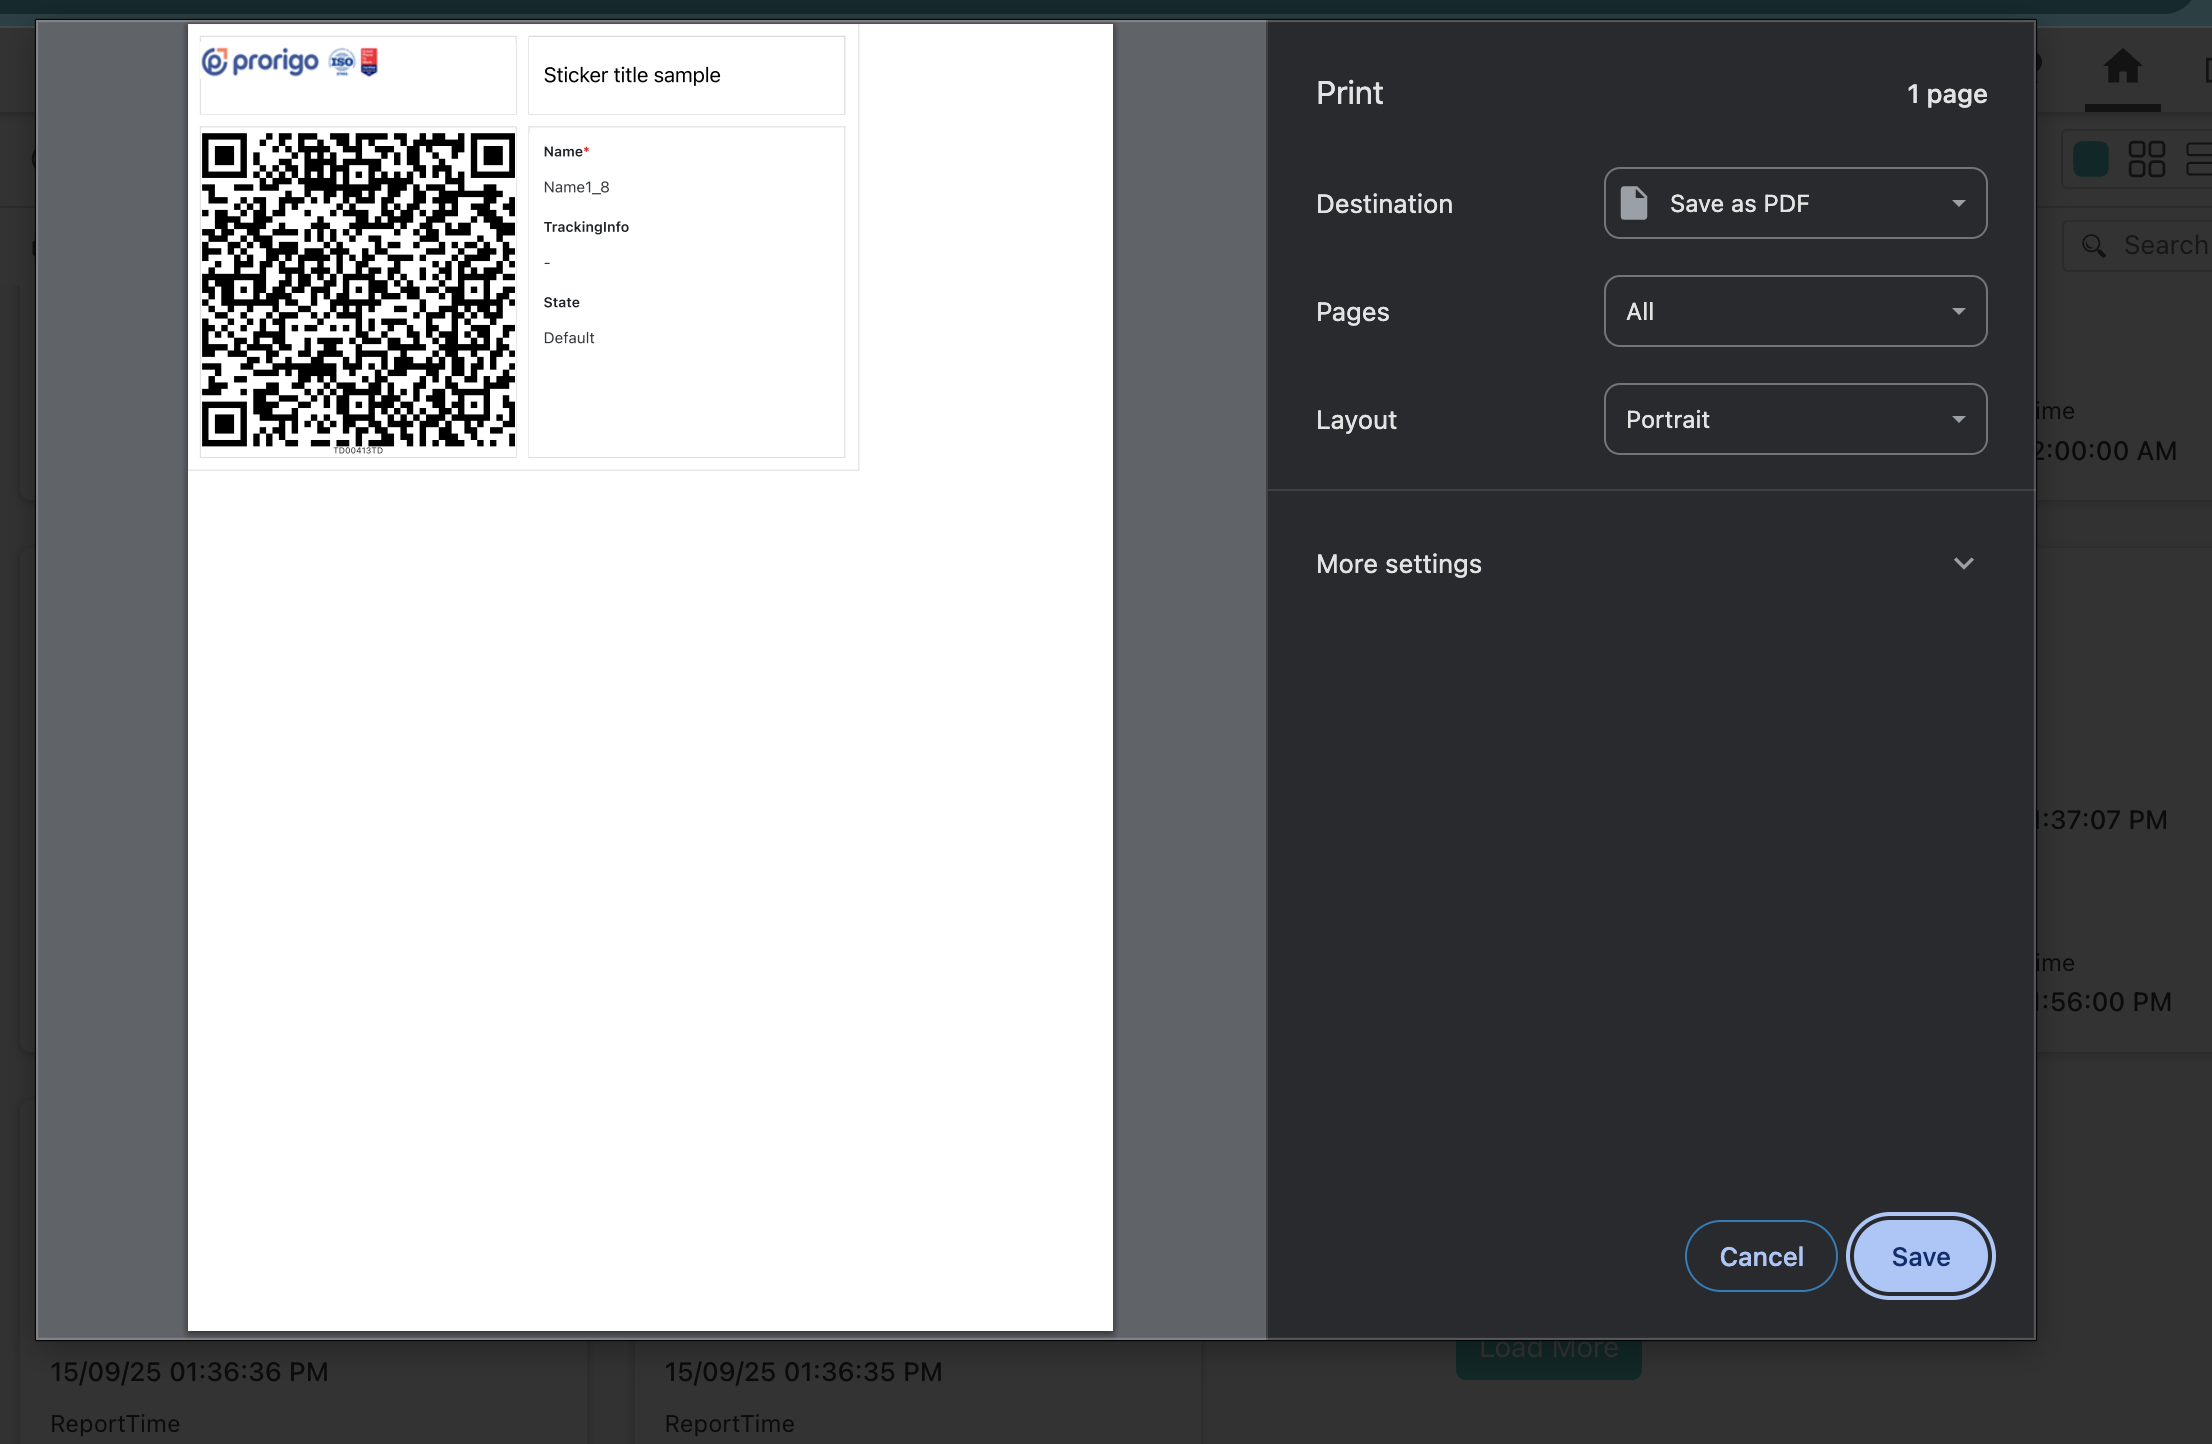
By default, Print Sticker prints a standard label with logo, tracking ID, and tracking info. Add a Sticker form to print a custom layout instead. Configuring a form is optional — without one, the standard label still works.
Existing Print Sticker actions without a form keep working unchanged. Sticker forms are purely additive.
To create a Sticker form first, see Sticker Forms.
Where This Action Is Available
| Surface | Available? | Sticker forms it accepts |
|---|---|---|
| View template page action | ✅ (as Print QR Code) | Type-scoped |
| Dashboard widget row action | ✅ | Type-scoped |
| Dashboard widget bulk action | ✅ | Type-scoped |
| Relation widget row action | ✅ | Relation-scoped |
| Relation widget bulk action | ✅ | Relation-scoped |
The two relation surfaces work like their dashboard counterparts, with one addition: the label can print the relation attributes stored on the link, not just the related record's own data. That is covered in Printing from a Relation Widget.
Add the Action
Print Sticker can be added in five places. In each case you follow the standard action-configuration flow and then set the optional Sticker Form field described below.
Row action — dashboard
- Open the Type Widget in Design Studio.
- In the Columns section, open the Actions column's settings.
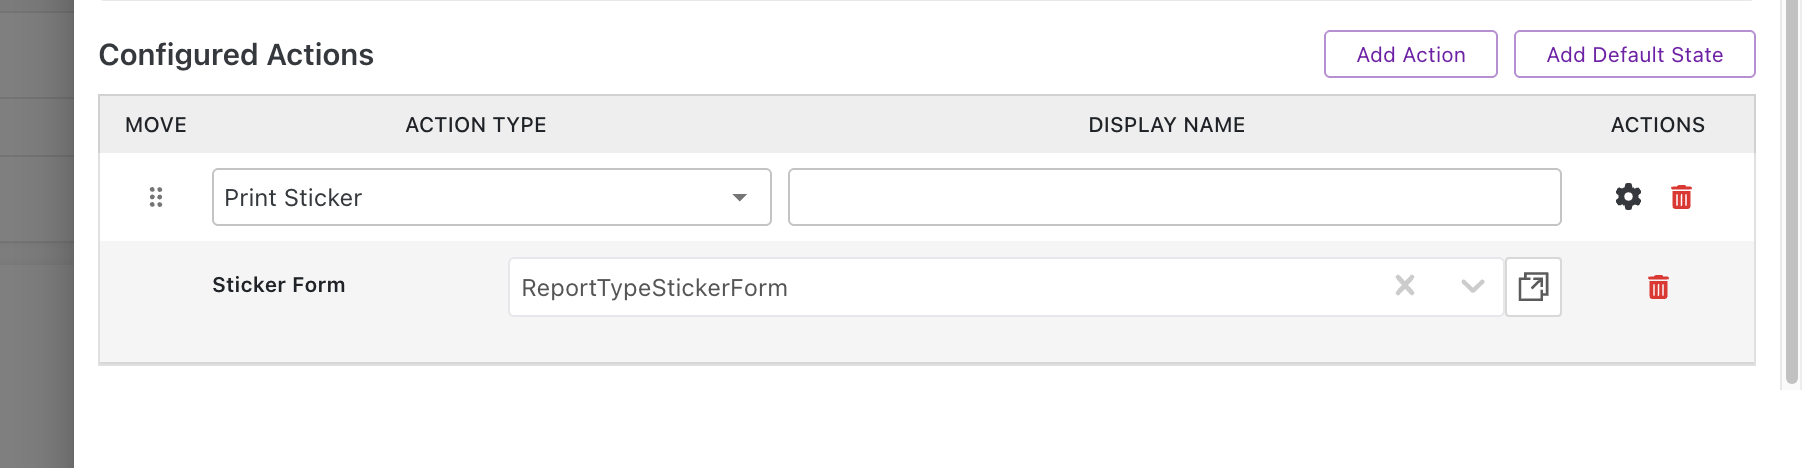
- Click Add Action, set Action Type to Print Sticker, and give it a display name.
- In the Sticker Form field, select the Sticker form to use.
This adds a per-row Print Sticker button to every record in the dashboard.
Bulk action — dashboard
- Open the Type Widget in Design Studio.
- Go to the Bulk Actions section.
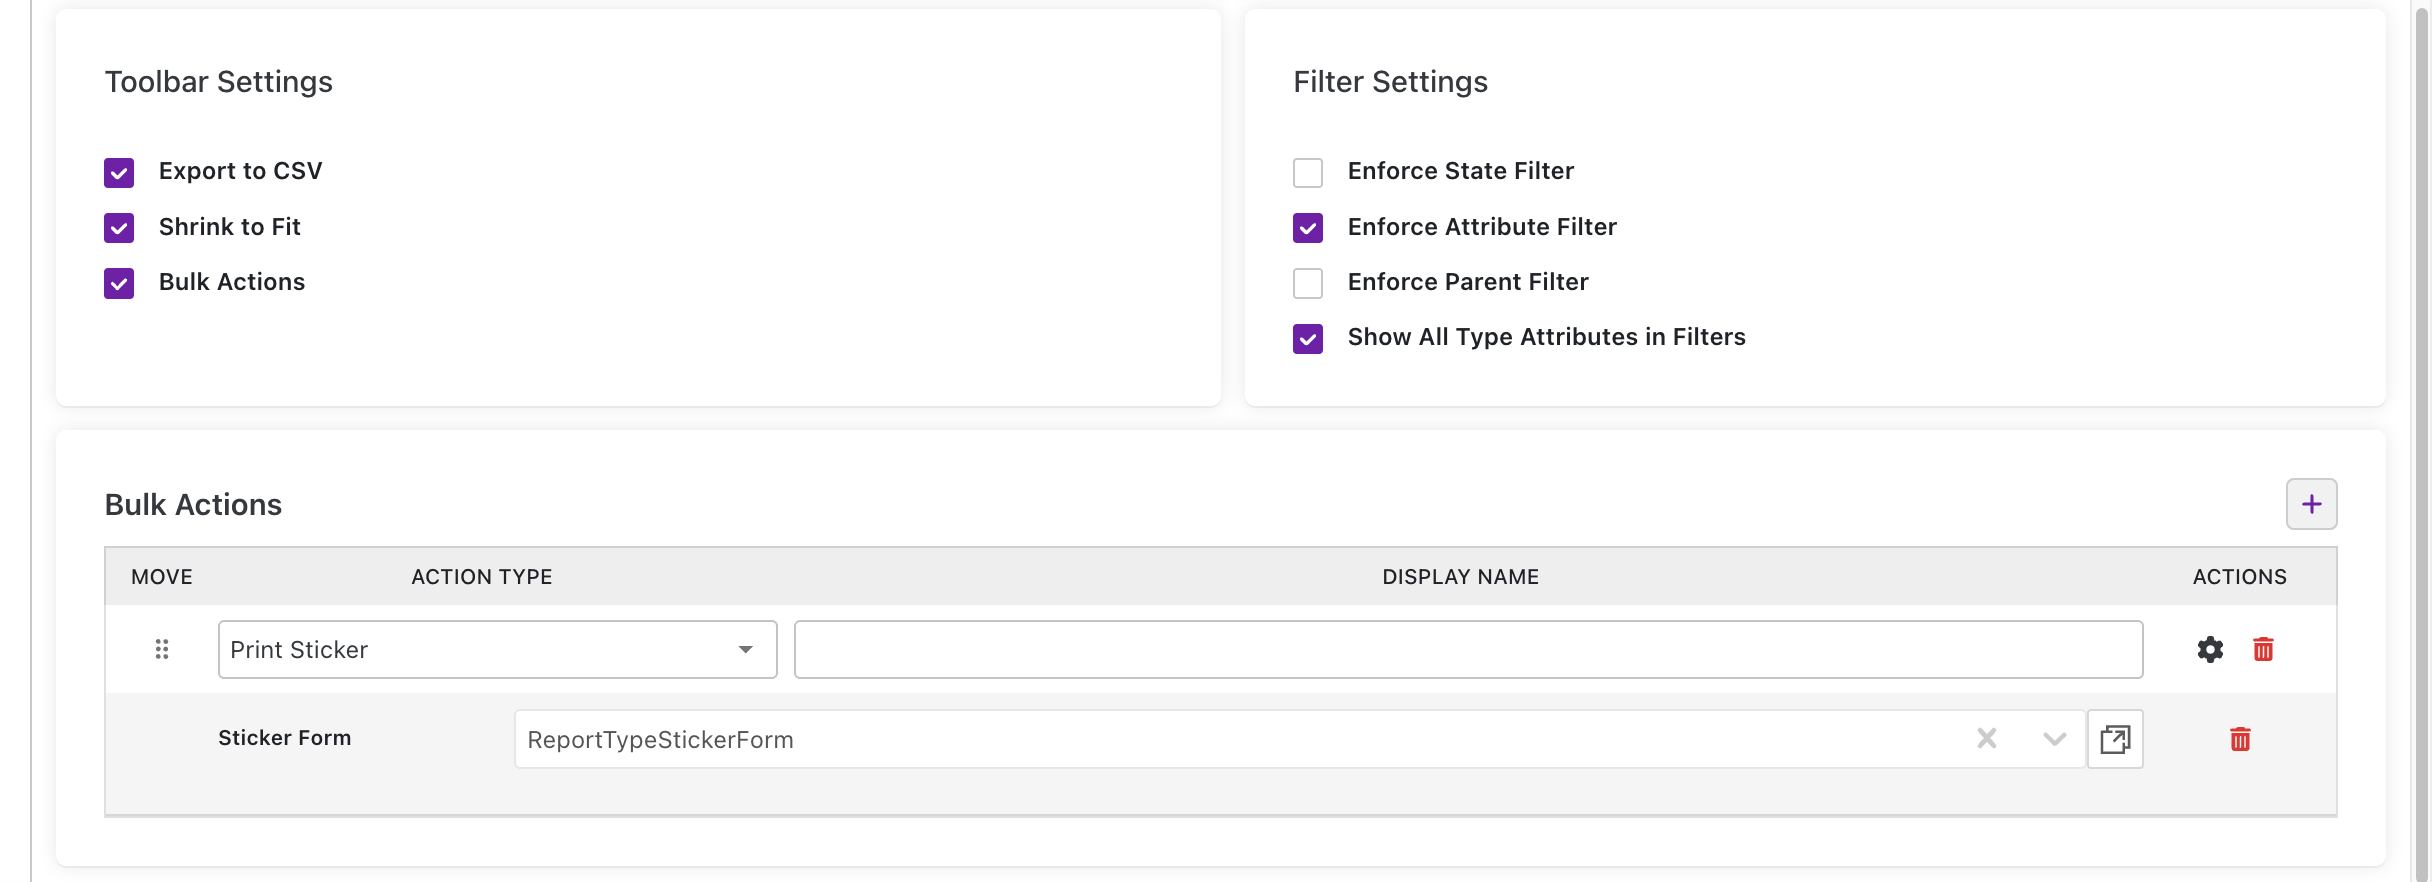
- Click Add, set Action Type to Print Sticker, and give it a display name.
- In the Sticker Form field, select the Sticker form to use.
Users select multiple rows and trigger Print Sticker to print labels for all of them in one browser-print session — one label per page.
Page action — record View template
- Open the Page Template in Design Studio, then open the View template for your type.
- Open Action Settings.
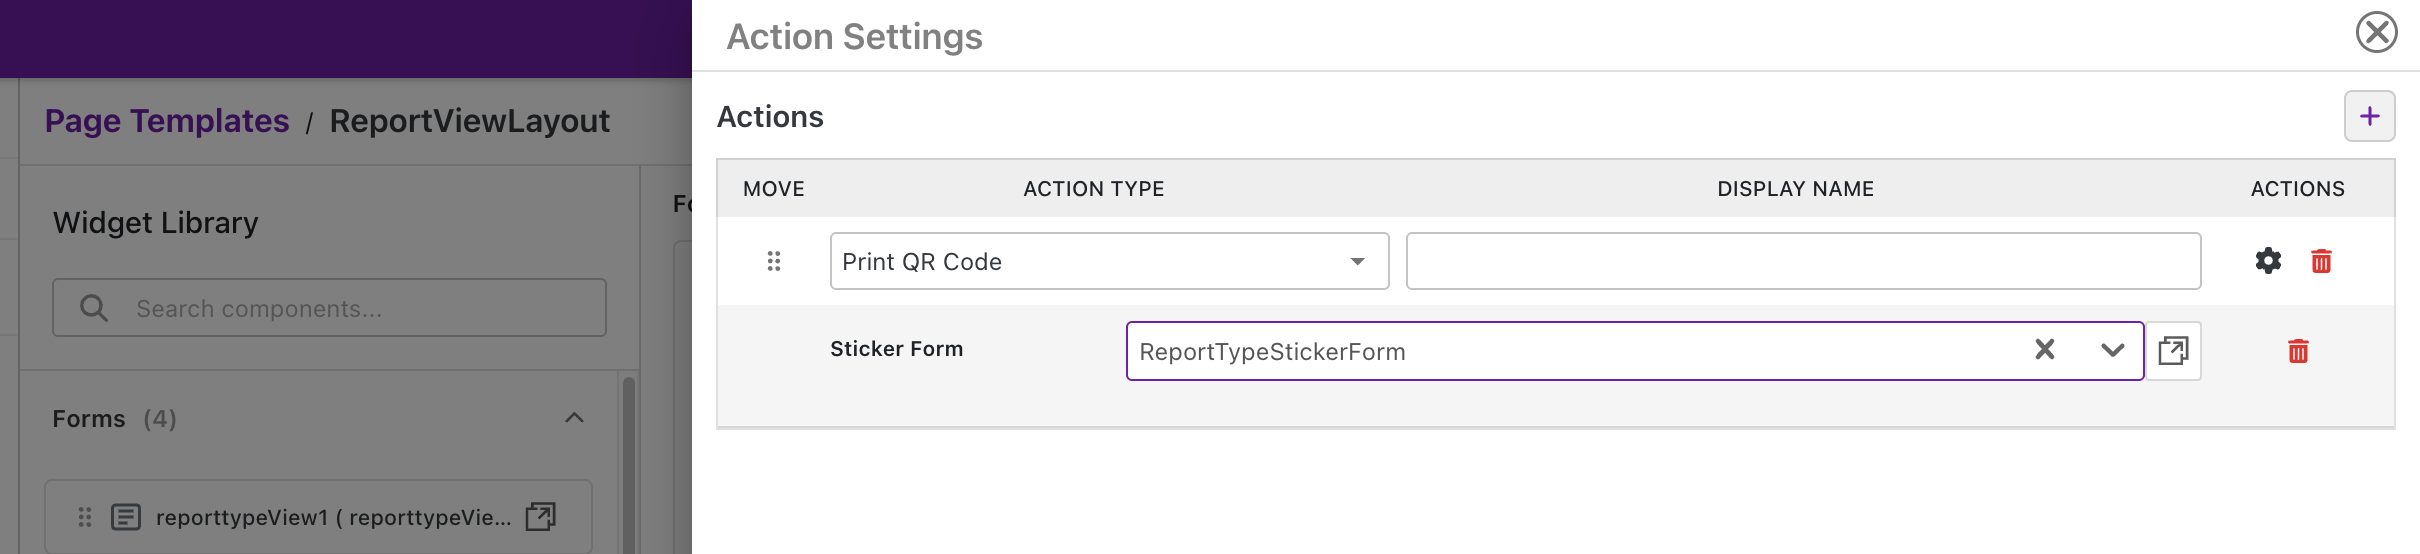
- Click Create, set Action Type to Print QR Code.
- In the Sticker Form field, select the Sticker form to use.
- Close the panel and Save the template.
This adds a Print QR Code button to the record's view page toolbar.
Row action — relation widget
- Open the Type Widget for the Relation widget in Design Studio.
- In the Columns section, open the Actions column's settings.
- Click Add Action, set Action Type to Print Sticker, and give it a display name.
- In the Sticker Form field, select the Relation-scoped Sticker form to use.
This adds a per-row Print Sticker button to every linked record in the relation widget.
Bulk action — relation widget
- Open the Type Widget for the Relation widget in Design Studio.
- Go to the Bulk Actions section.
- Click Add, set Action Type to Print Sticker, and give it a display name.
- In the Sticker Form field, select the Relation-scoped Sticker form to use.
Users tick several linked records in the relation grid and print all their labels in one browser-print session — one label per page, exactly like the dashboard bulk action.
The Sticker Form Field
All five surfaces expose the same Sticker-specific field once Print Sticker is chosen as the Action Type:
| Field | Description |
|---|---|
| Sticker Form | The Sticker-mode form to print. Leave blank to use the default QR-code-only label. |
| Go to Sticker Form (↗ icon) | Opens the selected form in Design Studio in a new tab for quick editing. |
The dropdown is filtered for you, so you can only pick a label that actually fits the surface:
| On a… | The dropdown lists |
|---|---|
| Dashboard widget or View template | Type-scoped sticker forms for that type |
| Relation widget (row or bulk) | Relation-scoped sticker forms for that widget's related type + relation type |
If a relation widget's Sticker Form dropdown is empty, no Relation-scoped sticker form exists yet for that related type and relation type. Create one — see Sticker Forms → Choose the Form Scope.
If a Print Sticker action names a Sticker Form, that form must exist and be a Sticker-mode form for the type. Deleting or renaming a Sticker form without updating the actions that reference it will cause a save error when you try to save the widget.
What Users See
The Print Sticker dialog
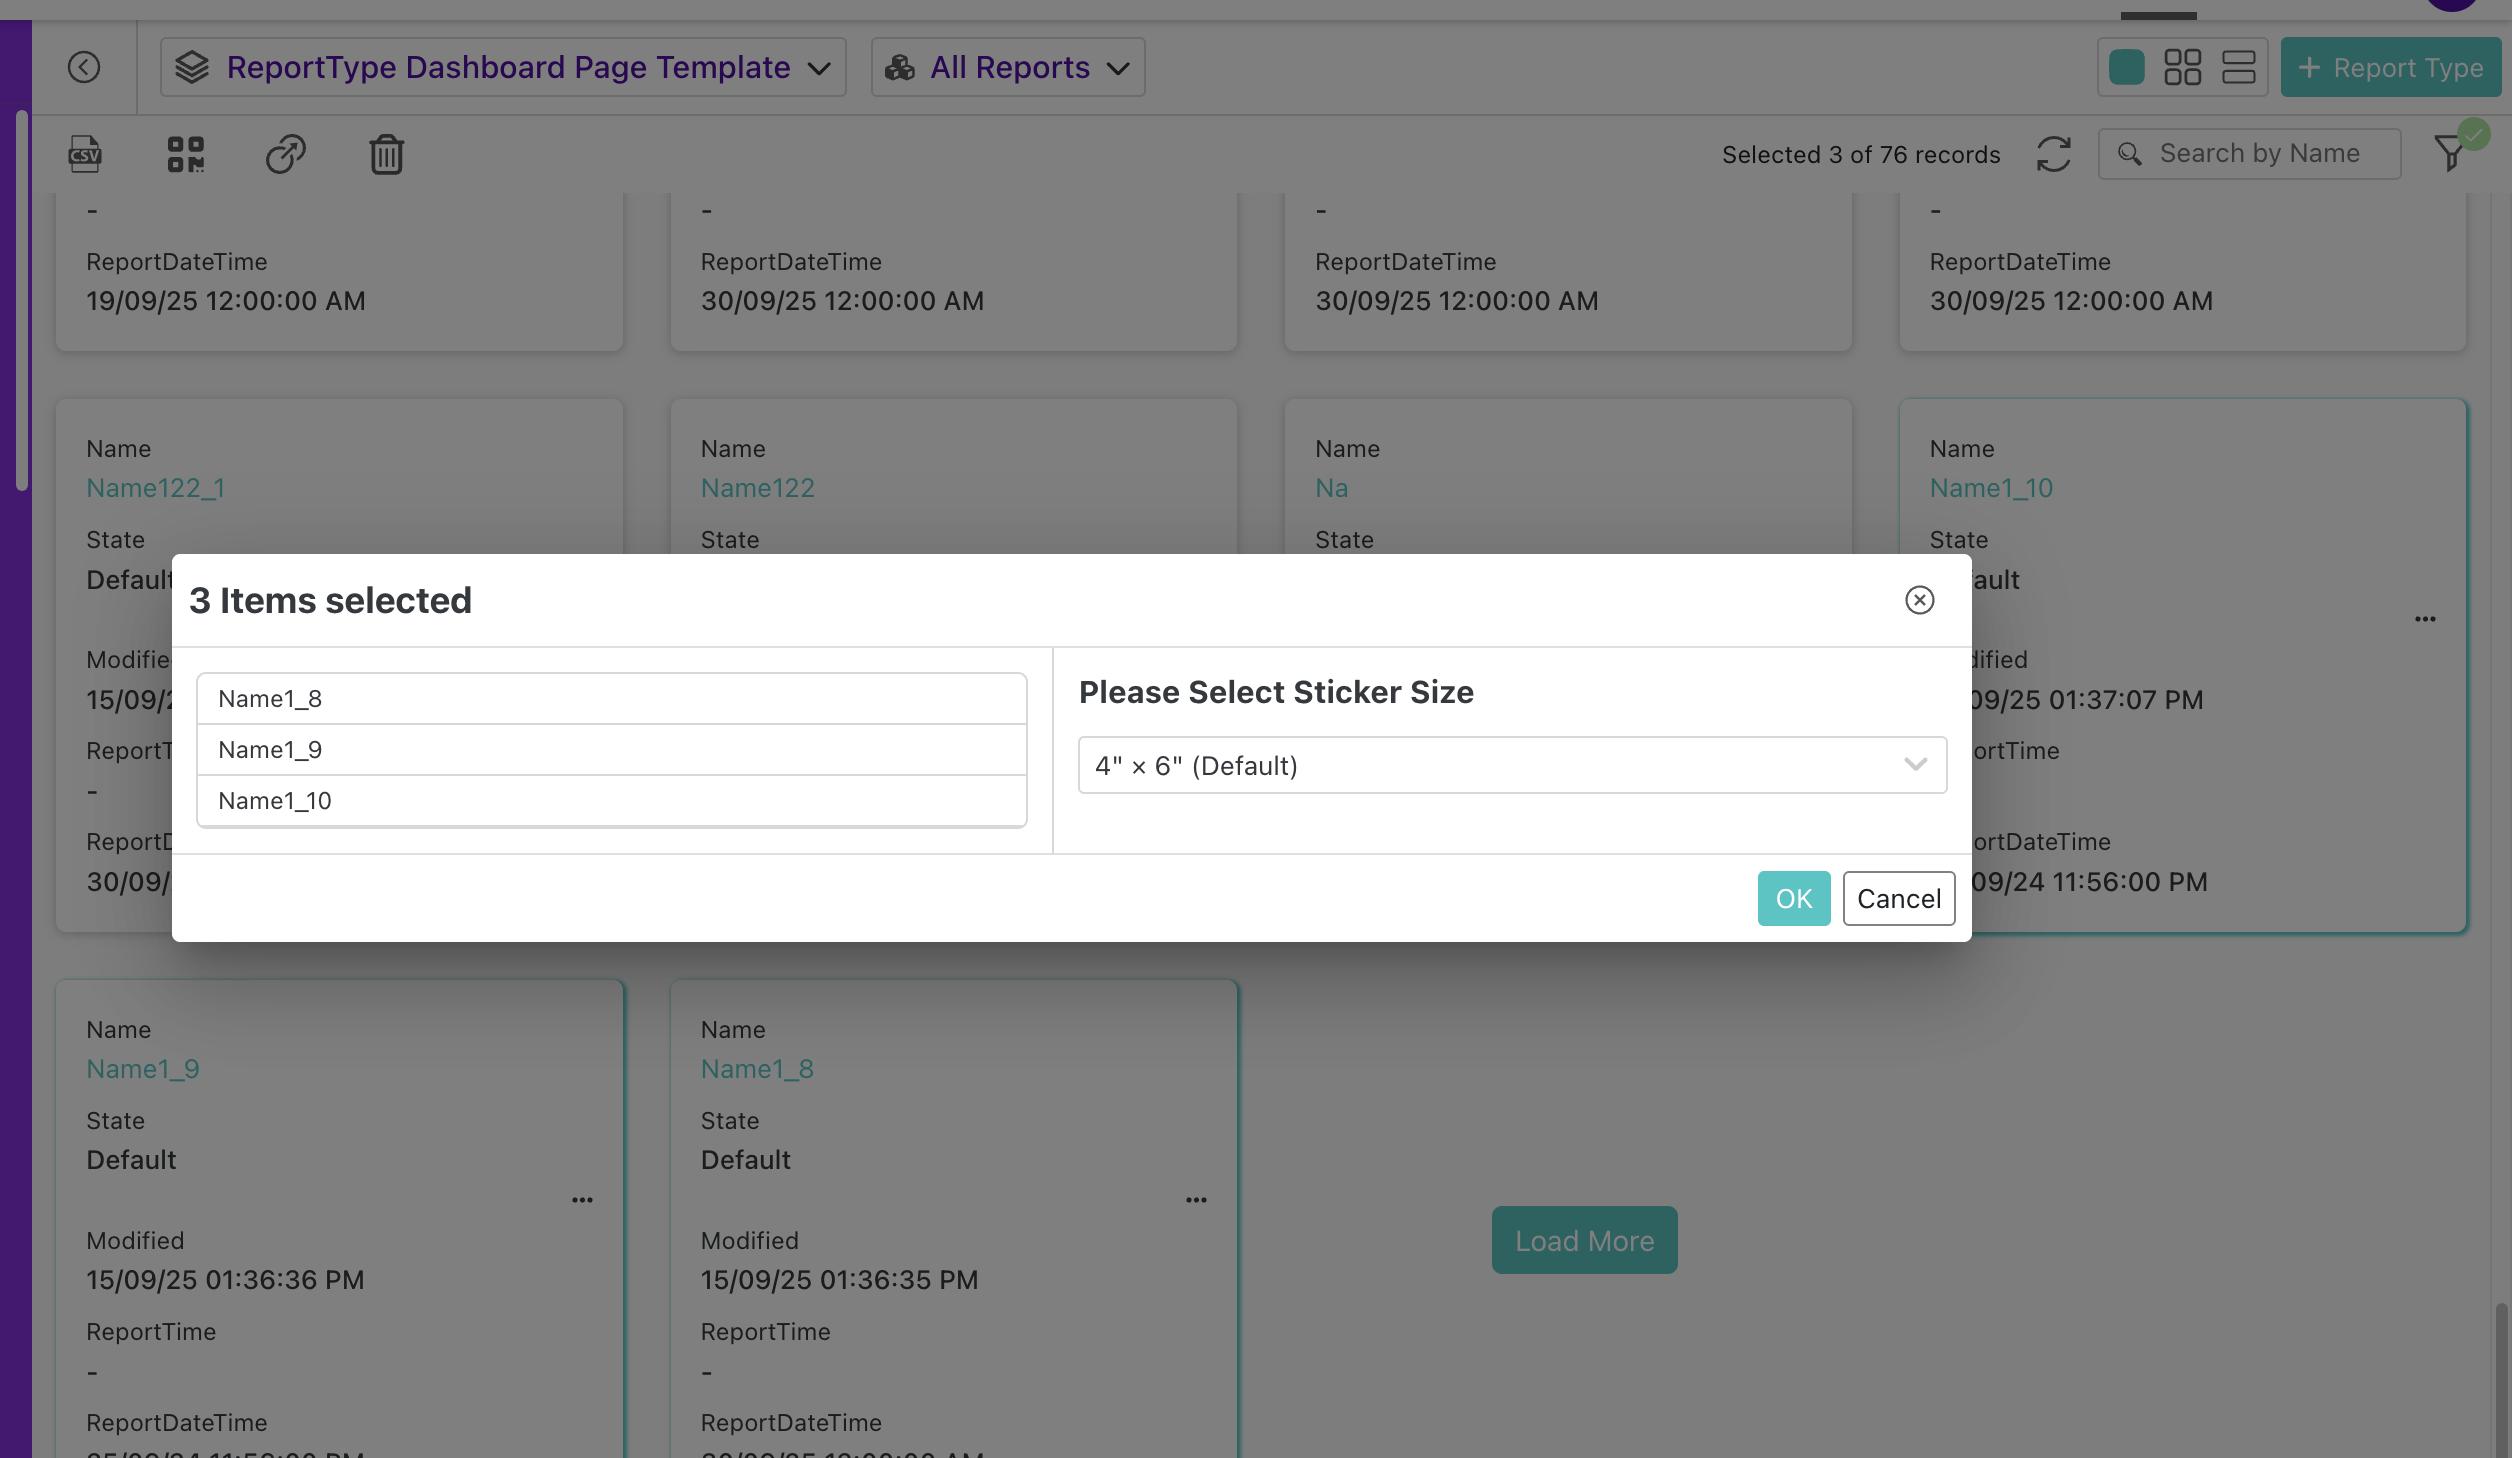
Clicking Print Sticker (single record or multi-select) opens a dialog showing the selected record(s). The user then:
- Picks a size from the "Please Select Sticker Size" dropdown.
- If a Sticker form is configured, the form's authored size is pre-selected and marked (Default). Other standard sizes and a Custom entry are also available.
- If no Sticker form is configured, only the standard sizes are offered.
- Protrak renders each label. A "Preparing stickers…" spinner shows a
(ready / total)count for bulk prints. OK stays disabled until every label has finished loading. - Clicking OK opens the browser's print dialog.
Printed output
- Labels print at the chosen physical size, with the optional border from the form settings.
- Your authored layout is uniformly scaled to fit if the user picks a different size — the design is never distorted.
- In a bulk print, each record gets its own page (one label per page).
Printing from a Relation Widget
A relation widget lists records linked to the record you are looking at. Every row there is really two things at once:
- the related record (a Pallet, a Person, a Part), and
- the link to it, which can carry its own values — relation attributes such as quantity, bin, role, or sequence.
A Relation-scoped sticker form can print both on the same label. That is the whole point of the relation surfaces: the same Pallet can be labelled "Order A — 40 units — Bay 3" on one order and "Order B — 12 units — Bay 9" on another, from one sticker form.
What gets printed
| On the label | Comes from | Same on every link? |
|---|---|---|
| Attribute field | The related record | Yes |
| Relation attribute field | The link the row represents | No — one value per link |
| QR Code (default) | The related record's Protrak identity | Yes |
| QR Code encoding a relation attribute | The link the row represents | No — one value per link |
Bulk printing follows the same rule per row: each selected row prints with its own link's values, not one shared set.
Relation values are fetched at print time
You do not need to expose a relation attribute as a column in the relation widget for it to print. When the label is prepared, Protrak reads each row's link and pulls the values the form asks for.
While that happens the dialog shows the usual "Preparing stickers…" spinner and holds OK disabled, so nobody prints a half-filled label. For a bulk print the (ready / total) counter covers every selected row.
Relation Attributes Must Actually Have Values
A relation attribute is blank on a label for one simple reason: nobody filled it in on that link. The sticker form does not create the value — it only prints what the link already holds.
There are two moments where those values are entered.
1. While linking the records
When a user links records through the relation widget's 🔍 search button (or the Link Related Instance action), the popup's right-hand pane asks for the relation attributes before the link is created. Whatever is entered there is written to every link made from that selection.
This is the best moment to capture them — the label is then correct the first time it is printed.
2. Afterwards, with the Edit Relation action
If a link already exists and its values are blank or wrong, use the Edit Relation row action on that row in the relation widget. It opens the link's current relation attribute values, and saving updates the link — without unlinking and re-linking the record.
Add it once on the relation widget: Columns → Actions → Add Action → Edit Relation.
On a relation widget that prints labels, configure Edit Relation next to Print Sticker. A user who sees a blank value on a printed label can fix it on the same row and reprint immediately.
Both moments can use a designed layout instead of Protrak's built-in field list — see Edit Relation Action & Link Popup. A Quick Edit form with Relation scope is a third option when users need to edit the related record and the link together.
A printed label is static paper. After filling in relation attributes, print the label again — an existing printout does not update.
Preview vs. Print
Relation attributes are the one place where the Design Studio Sticker Preview cannot show you the finished result.
The preview draws your label with a record you pick from a dropdown. It never picks a link — so relation attribute values have nowhere to come from:
- A relation attribute field previews with its label and an empty value.
- A QR Code widget encoding a relation attribute previews as nothing at all, because a QR code needs a value to encode and there is none. (A QR whose attribute is empty is never drawn — this is the same long-standing rule, not a relation-specific quirk.)
The preview says so itself, above the label:
Relation attribute values come from the linked record, so they stay blank here.
Everything else — size, border, titles, rich text, spacing, and the related record's own attributes — previews exactly as it prints. Use the preview for layout; use a real Print Sticker run from the relation widget to check values.
Troubleshooting
| Symptom | Likely cause |
|---|---|
| The Sticker Form dropdown is empty on a relation widget | No Relation-scoped sticker form exists for that related type and relation type. Type-scoped forms are deliberately not offered here. |
| Relation attribute fields print blank | That link has no value for the attribute. Fill it in with Edit Relation on the row (or when linking), then reprint. |
| The QR code is missing from the printed label | Its Encode from attribute points at an attribute with no value on that record or link. |
| Relation attribute values are blank in the preview only | Expected — the preview picks a record, not a link. See Preview vs. Print. |
| Print Sticker is missing from the relation widget's action list | It is not part of the default action bundle on relation widgets. Add it explicitly with Add Action. |
| The bulk Print Sticker button doesn't appear after selecting rows | The button only enables when every selected row permits Print Sticker. Deselect the rows whose state or permissions block it. |
| Different rows printed the same relation values | The label is placing a record attribute, not a relation attribute. Record attributes are identical on every link to that record — swap the field for the relation attribute of the same name. |
Next Steps
- Design a Sticker form: Sticker Forms
- Capture relation attribute values on a link: Edit Relation Action & Link Popup
- All form types and the Form Builder: Forms
- Configure other page actions: Page Template Editor
- Return to the module overview: Admin Configuration Guide